The FSBO Photo Playbook: Listing Photos That Compete With Agents
Sell your own home with photos that hold their own next to the pros on Zillow.
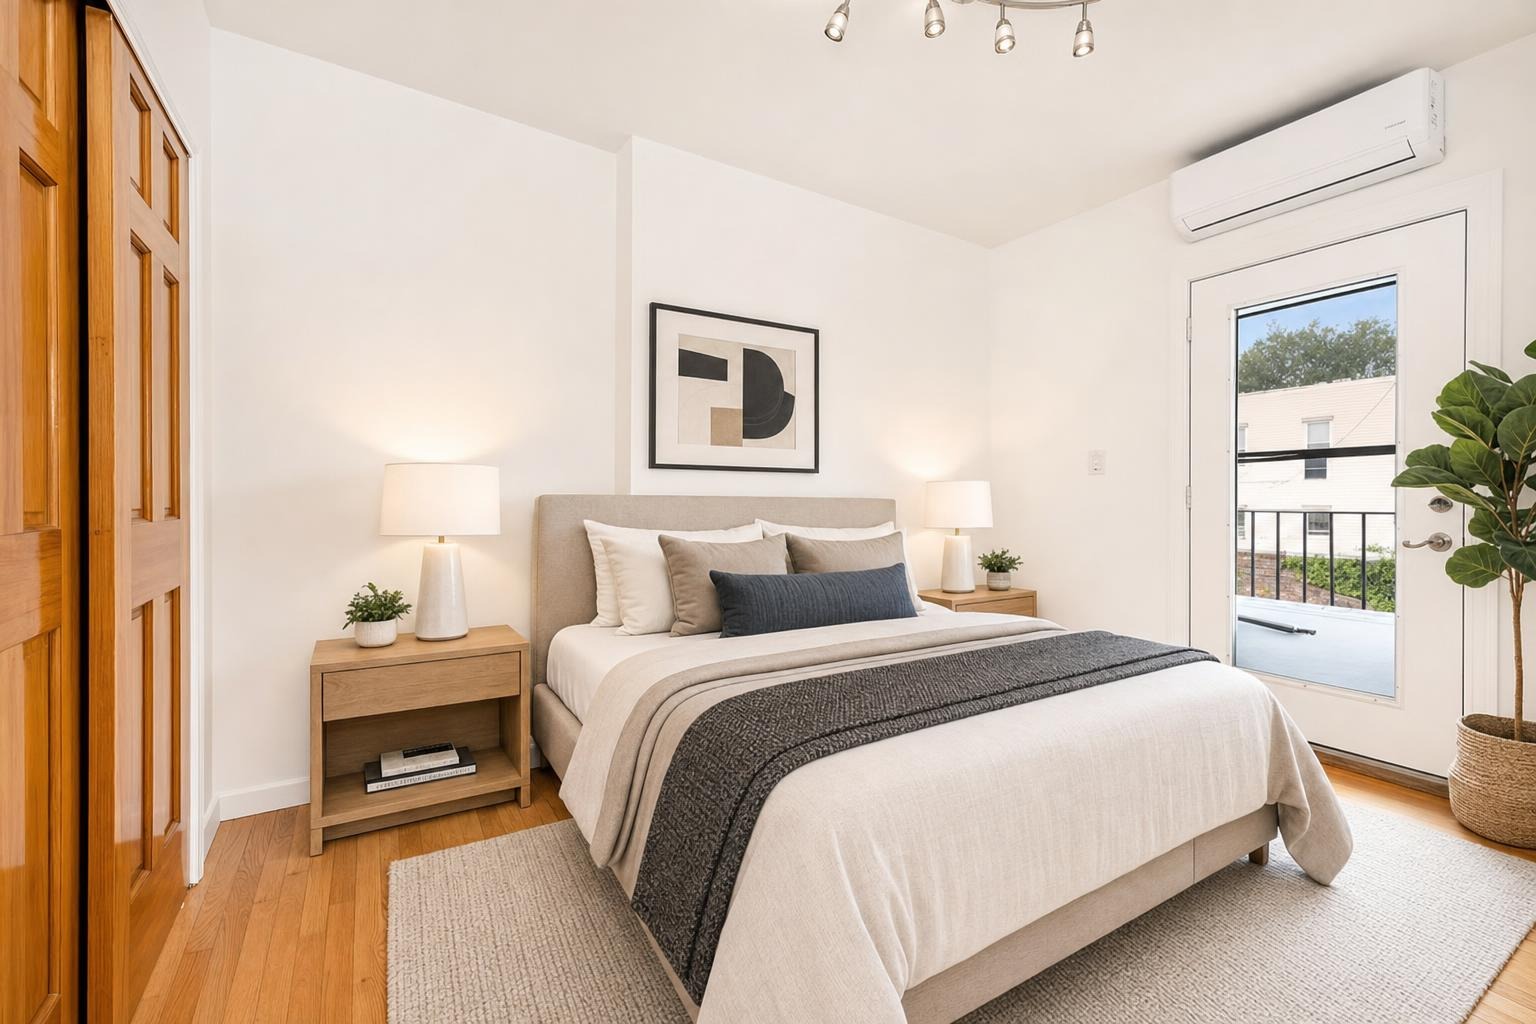
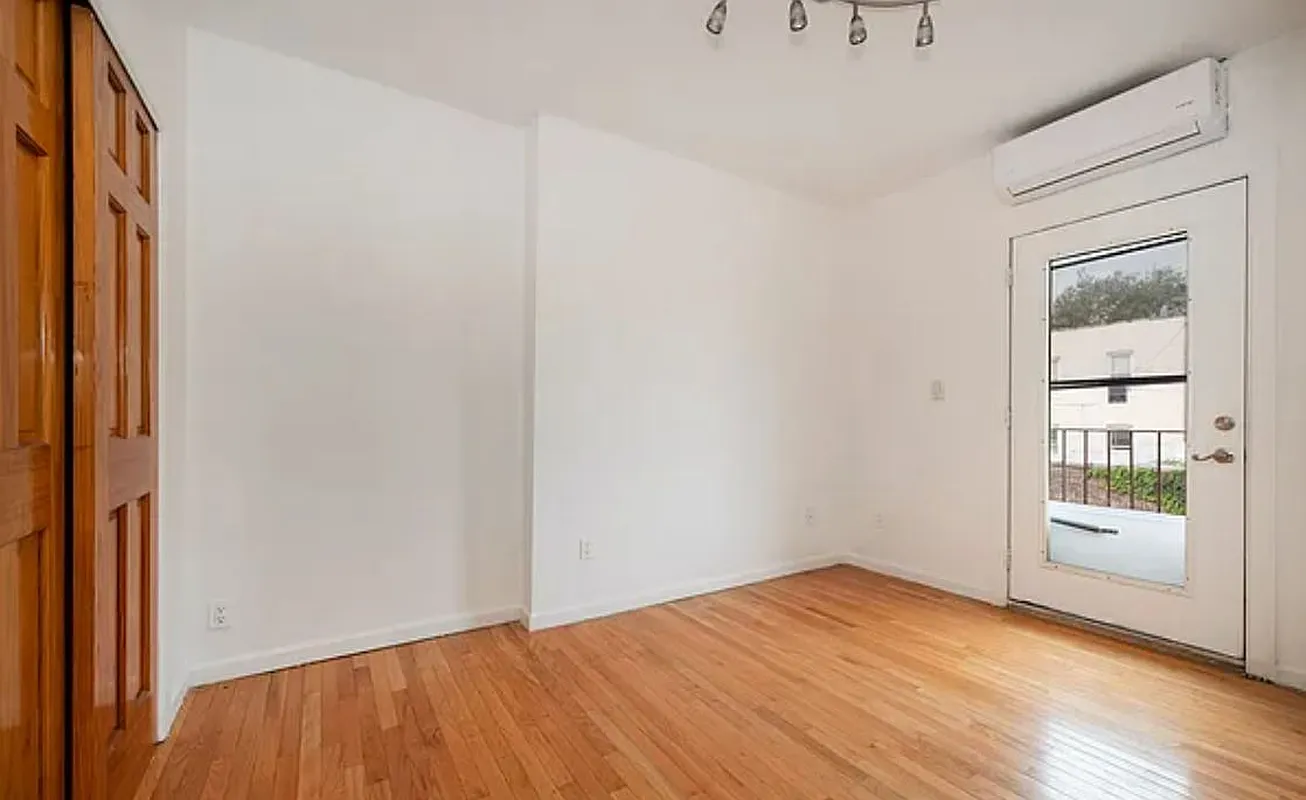 after · staged
before
after · staged
before
When you sell your own home, you skip the commission — but you also skip the agent's photographer, their stager, and their eye for what makes a listing stop the scroll. That's a real gap, because on Zillow and Redfin your photos don't sit in a vacuum. They sit in a grid, right next to professionally shot agent listings, and a buyer's thumb decides in a second which ones to tap. Without an agent, your photos are your storefront. They have to compete.
The good news: the playbook the pros use isn't a secret, and most of it you can do from a phone. Here's the step-by-step.
1. Declutter and clean every room first
Before you shoot a single frame, reset the space. Clear countertops, hide cords and chargers, pull personal photos and fridge magnets, empty trash cans, and put the toilet lids down. Open the blinds. A clean, depersonalized room photographs bigger and lets a buyer picture themselves living there instead of cataloging your stuff. This is the cheapest, highest-return step in the whole process — and it costs nothing but an afternoon.
Go room by room with a critical eye, the way a buyer scrolling at 11pm would. Anything that says "this is someone else's house" — laundry baskets, kids' toys, a crowded bookshelf, a counter full of small appliances — pulls attention away from the room itself. Pare it back until each space feels calm and open. A camera exaggerates clutter, so a room that looks merely "lived-in" in person can read as messy in a photo.
2. Shoot in daylight, with the lights on
Photograph during the day, when natural light fills the room, and turn on every interior light anyway — it warms up shadows and kills dark corners. Hold the phone level (vertical lines should stay vertical, not lean), shoot from a corner to capture two walls and show the room's full depth, and keep the camera around chest height. Avoid pointing straight into a window, which blows out the exposure. For the full technique — angles, height, and the settings that matter — see our guide on how to photograph a room for real estate.
3. Stage empty or sparse rooms so they read move-in ready
An empty room is the hardest thing to sell. Buyers can't read scale, can't tell where a bed or couch would go, and scroll right past. If a room is bare or thinly furnished, stage it so it looks lived-in. You don't need to rent furniture — virtual staging adds it to the photo digitally in about a minute. The result reads "move-in ready" instead of "cold and empty." Walk through exactly how to do it in how to stage an empty house for photos.
4. Lead with your single strongest photo
The first photo in your listing is the one that earns the click. It's usually the kitchen, the main living room, or the exterior — whichever is the most impressive and best-lit room in the house. Don't lead with a hallway or a bathroom. Pick your hero shot deliberately and make it the cover image, because that thumbnail is doing more work than the other twenty photos combined. Then order the rest of the set like a walkthrough: lead room, kitchen, primary bedroom, bathrooms, secondary rooms, and outdoor space last. A logical flow keeps buyers tapping through instead of bailing after photo three.
5. Nail the exterior and any outdoor space
For a huge share of searches, the exterior is the first thumbnail a buyer sees. Mow the lawn, sweep the walkway, move cars out of the driveway, and shoot the front of the house in good light — early morning or late afternoon flatters most homes. If you have a backyard, deck, or patio, give it the same care; outdoor space sells, and a tidy, well-lit yard shot can be the difference between a tap and a scroll-by.
6. Keep it honest — disclose any virtual staging
If you virtually stage a room, label it as virtually staged on the listing. Buyers should never show up expecting furniture that isn't there. It's an easy line to add, it keeps you on the right side of MLS and platform rules, and it protects you from a disappointed-buyer headache later. Honest photos that look great beat misleading photos every time.
7. Upload full-resolution, landscape images
Don't let your work die in the upload. Shoot and submit full-resolution photos — Zillow and the MLS downsize as needed, but they can't add detail you didn't give them. Use landscape (horizontal) orientation, which fits the listing layout and thumbnails properly; vertical phone shots get cropped awkwardly. A crisp, correctly oriented image looks instantly more professional than a small or sideways one.
Why the photos carry so much weight.
The overwhelming majority of buyers shop online before they ever set foot in a home, and they judge listings by the photos first. Staged listings tend to draw more interest and stronger offers — the numbers are in do staged listings sell faster.
The FSBO advantage you actually have
An agent's edge was never magic — it was a photographer and a stager. Both are now things you can do yourself from a phone. Shoot a clean, well-lit, level photo of each room, stage the sparse ones, lead with your strongest image, and upload it full-size. Do that and your listing stops looking like a "for sale by owner" compromise and starts looking like every polished agent listing next to it.
That's where Stylst fits in. Snap any room or backyard on your phone, and Stylst brightens, declutters, and professionally stages it in about a minute — for around $1 a photo, no subscription. It's on Google Play, so you can stage a whole house for the cost of lunch and get agent-grade photos without the agent.