Bulk Virtual Staging: Do a Whole Listing in One Pass
Twenty-four photos and an evening. Here's the pass that gets you a finished listing that looks like one house — the same furniture carried from photo to photo, automatically — plus a video at the end you didn't have to shoot.
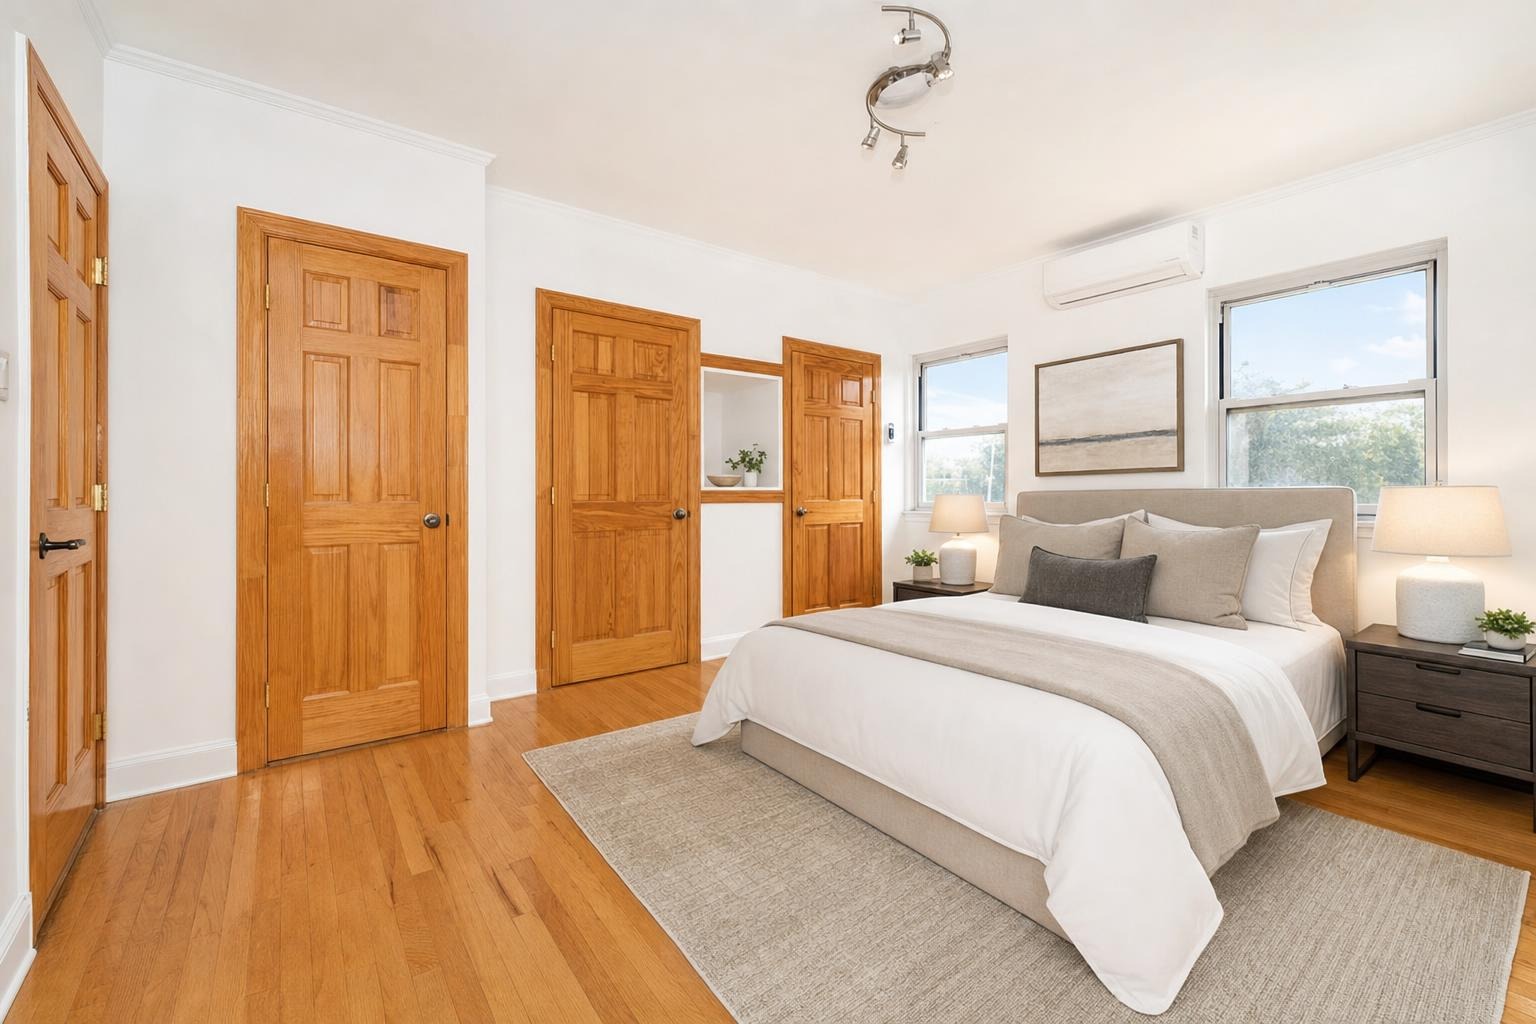
 after · staged
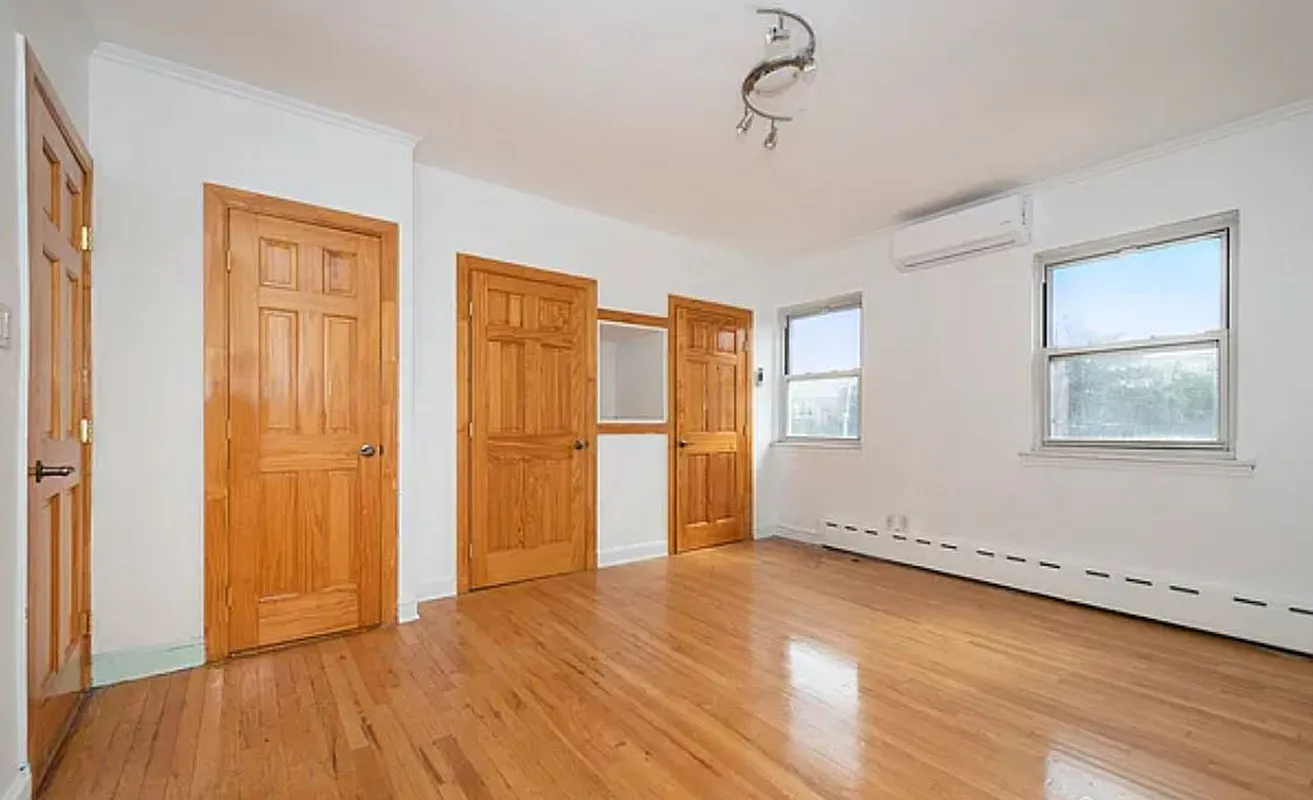
before
after · staged
before
The short version
Twenty-four photos and an evening. Shoot everything before you upload anything, pick one style for the whole listing, write the photo rule once before the batch rather than per photo, use one tool per room family, then review the finished set as a set instead of one photo at a time.
Staging one photo is a party trick. Staging a listing is a job.
The difference isn't quality, it's consistency. Work photo by photo — one on Tuesday night, four more on Thursday when you remember — and you make fresh choices every time. Modern on Tuesday. Scandinavian on Thursday, because the thumbnail looked nicer. By the weekend, the living room and the primary bedroom belong to two different houses.
And buyers don't view listing photos one at a time. They flick through twenty in ninety seconds, and inconsistency is the one flaw that gets more visible at that speed, not less. A sofa that's slightly too big reads as a room. Two design languages read as a lie.
Here's the part we're proud of: the hardest kind of consistency — the furniture itself — is now automatic. Stage a listing and Stylst carries one furniture set through the whole home: the first photo of each room sets the furniture, and every other angle matches it. The same sofa, the same rug, the same barstools at the island, carried into every staged photo of the listing. A customer called this out on us once — barstools at the island in one staged photo, missing in the next angle — and they were right. That's the flaw this exists to end.
What's left for you are the decisions that should be yours — the style, the tools, the rules. Make them once. Here's how.
1. Shoot everything before you upload anything
Don't upload as you go. Walk the house, shoot the full set, then sit down once.
Every room gets one wide shot from the corner that shows the most floor; the rooms that matter get a second angle. Open the blinds, turn on every light, hold the phone at chest height and keep it level so the verticals stay vertical. If you don't have a shot list, use ours — and this is how many photos you actually need, usually fewer than you think. The photo you get back matches the aspect ratio you sent in, so shoot the frame you want in the gallery; nothing gets cropped behind your back.
2. Pick one style for the whole listing
Before you touch anything else, make one decision: Modern, Midcentury, Scandinavian, Luxury, Coastal, or Farmhouse. That's the listing's style, and every staged room in the set gets it.
Pick it off the house, not off your taste. A 1958 ranch is Midcentury. A white-box condo is Modern. A shingled cottage near the water is Coastal. When the style fights the architecture, buyers can't say why the photos feel off, but they feel it.
The temptation in bulk is to let each room be its own thing — a Luxury primary suite because it's the money shot, a Coastal guest room because the light is nice. Resist it. A gallery is a sequence, and mixing design languages inside a sequence is the most reliable way to make a real house look fake.
The good news: this is the one consistency decision still on your plate. Stylst keeps the furniture inside the style — which sofa, which rug, which barstools — consistent across the whole home. Step 5 shows it working. Your job is the taste call. Make it once.
3. Write the rule once, before the batch
A photo rule is a standing plain-English instruction saved to your account — "never add plants." "No abstract wall art." "Keep the ceiling fan." — applied to every photo you generate afterwards. Exactly what you want when the next thing you generate is twenty-four photos.
This is the part people skip, and the part that pays. Without a rule, the batch's decorative guesses get made for you — and because the furniture set carries through the home, if the first photo picks up a fiddle-leaf fig, the rest of the set inherits it. The rule stops it once, at the top. There's an "Always" rule and a per-room rule, so "never add plants" can run across the board and "nothing on the counters" only in the kitchen.
Phrase the rule the way an instruction actually lands: name what you want rather than what you don't — "bare counters, one bowl of fruit" beats "no clutter". A rule rides every photo in the batch, so the twenty-fourth photo gets the same instruction as the first. How to write one that lands.
4. One tool per room family
The other half of consistency is not staging things that shouldn't be staged. Sort the set into families, and give each family one tool:
- Empty rooms → Stage. The tool that adds furniture, in your one chosen style. 1 credit.
- Lived-in rooms → Declutter. Rooms with the seller's real furniture still in them. It takes away the laundry, the mail, the toys, and the cords, and leaves the real furniture where it is. Don't Stage these — you'd be replacing a room the buyer is about to walk into. 1 credit.
- Rooms that are already fine → Enhance. A pro edit: brighter, color-corrected, straightened, nothing added or removed. Most of your set, as it should be. 1 credit.
- One hero exterior → Day to dusk. Exactly one. A daytime front elevation becomes golden-hour twilight, and your thumbnail. Two dusk shots is a mood; six is a costume. 1 credit, outdoors only.
Sorting the set takes four minutes and stops the most common bulk mistake: Staging a room that already has furniture in it, because the Stage button was right there.
5. Run the batch and let the queue work
Upload the set on the web, label each photo with its room type and its tool, and start it. Each photo takes about 30 seconds and the queue works through them without you. Go make dinner.
One furniture set per home — automatically
While the queue works, Stylst is doing the thing you used to have to police by hand: keeping the furniture consistent. Within a batch, the first photo of each room sets the furniture and every other angle of that room matches it. Open-plan homes are covered too — if the living room shot can see the kitchen island, it sees the same barstools the kitchen photos have. And if a straggler shot of the same home comes in later that day — same style — it picks up the same set on its own.
This is the detail that separates staging a buyer trusts from staging a buyer squints at. Buyers flip between angles, and a sofa that changes between two photos of one room reads as fake — and once one photo reads as fake, the whole gallery loses the benefit of the doubt. One furniture set is what makes a staged listing read like a photographed house.
Label carefully, though — this is where bulk is riskier than one at a time. On a single photo, an obvious mismatch usually gets flagged before the charge — a one-tap "switch to Bathroom?" banner. In a batch, Stylst suggests a room for each photo as you upload it — but a guess is not a decision, that last-second check doesn't run there, and you're moving fast down a list. A wrong label runs, and gets charged, as labeled. Check the labels before you hit start.
What a listing actually costs
One credit is one photo, so a 24-photo listing is 24 credits — roughly $24, about a dollar a photo.
Credits get cheaper in bulk: 10 for $16.99, 30 for $44.99, and 100 for $129.99 — about $1.30 a photo at the top pack. For a full listing the 30-pack is the obvious one-time buy: the set, plus a few left over for re-runs.
No subscription, no per-seat fee: you buy credits, they sit there, you spend them when a listing comes in. Weighing that against a monthly plan? We did the arithmetic in subscription vs pay-per-photo. Running a whole office instead of your own listings? A shared credit pool with per-member caps is the brokerage version.
Don't stage all twenty-four.
The instinct in bulk is to run everything through the machine because it's cheap and it's right there. Resist that too. Buyers scroll a listing hunting for the rooms that decide the house — the kitchen, the primary, the yard, the living room — and a gallery where every closet, hallway, and laundry nook has been AI-touched doesn't read as thorough. It reads as a listing hiding something. Stage the rooms that sell the house, Enhance the rest, and leave the honest photos honest.
And the disclosure doesn't get a volume discount. Virtually staged photos have to be labeled as virtual staging under MLS and marketplace rules. Batching doesn't change that — it just means you have more of them to label. Declutter takes away clutter, never a fixture, never structure, and never a defect. A photo that quietly erases a problem is a photo that comes back at the inspection.
6. Review the set as a set
When the queue finishes, don't judge the photos one at a time. Put them in gallery order and scroll it like a buyer would. You're looking for two things: does the sequence hold together, and does anything promise something the house doesn't have? The furniture half of that first check should already be handled — the wide shot and the close-up should carry the same pieces. Give it a glance anyway; a sofa that drifted between two angles is exactly the kind of miss to tell us about. What you're really judging is the style call and the honesty. Fix what's off, ignore the rest. A photo that's merely 90% of what you imagined is fine; a photo that breaks the sequence is not. If one comes back wrong, say so. Tell us within 24 hours and we'll re-run it free with your feedback — and if it still misses, we'll credit you back.
7. Turn the finished set into one video
Here's the part nobody expects. You now have a folder of finished, consistent photos of one house — the exact raw material for a listing video you never shot.
Select up to 10 of them and Stylst crossfades them into a single project reel: one video of the whole listing, in the shape you need. Story 9:16 for Instagram and TikTok, square 1:1 for the feed, feed 4:5 for the tall version. Tap them in the order you'd walk someone through the house; that's the order they appear.
It's free, along with the AI captions, share cards, export presets, and the brand kit that puts your name, phone, and area in a strip along the bottom. There's a whole piece on the reel if you want the details. The point: the batch you ran to fill the MLS gallery also filled the social post — and the social post is what gets the listing seen.
Questions people actually ask
Can I stage multiple photos at once?
Yes. On the web you upload the set, assign each photo a room and a tool, and the queue works through them one after another at about 30 seconds each, so a 24-photo listing runs while you do something else. Staged photos of the same home come back with a matching furniture set — the first photo of each room sets it, the rest follow.
How much does it cost to stage a whole listing?
One credit covers one finished photo, so a 24-photo listing fits inside the 30-credit pack at $44.99. Higher-volume agents can buy 100 credits for $129.99 without taking on a subscription.
Should I stage every photo in a listing?
No. Stage the rooms that sell the house and leave the rest honest, because a listing where every closet and hallway has been touched by AI reads as a listing hiding something. Enhance is the right tool for the photos that are already fine.
Can I use different styles for different rooms in the same listing?
You can, but you should not. A buyer scrolls your photos in one sitting, and a Scandinavian living room next to a Luxury bedroom reads as two different houses, which is the fastest way to make a real house look fake. Pick one style for the listing; within it, Stylst carries a matching furniture set across your staged photos automatically.
The bottom line
A listing is a set, not a pile of photos, and the job of a bulk pass is protecting that. Shoot everything first, pick one style, write the rule once, give each family of rooms a single tool, and let the queue do the boring part — including the part that used to be the hard part: one furniture set, carried from photo to photo. Then stage only the rooms that sell the house, label the ones you staged, and take the free reel on the way out. Twenty-four photos, one evening, about twenty-four dollars, and a video you didn't shoot.