The Real Estate Photo Shot List
Walk the house once with this list and you'll never realize back at your desk that you missed the room a buyer wanted to see.
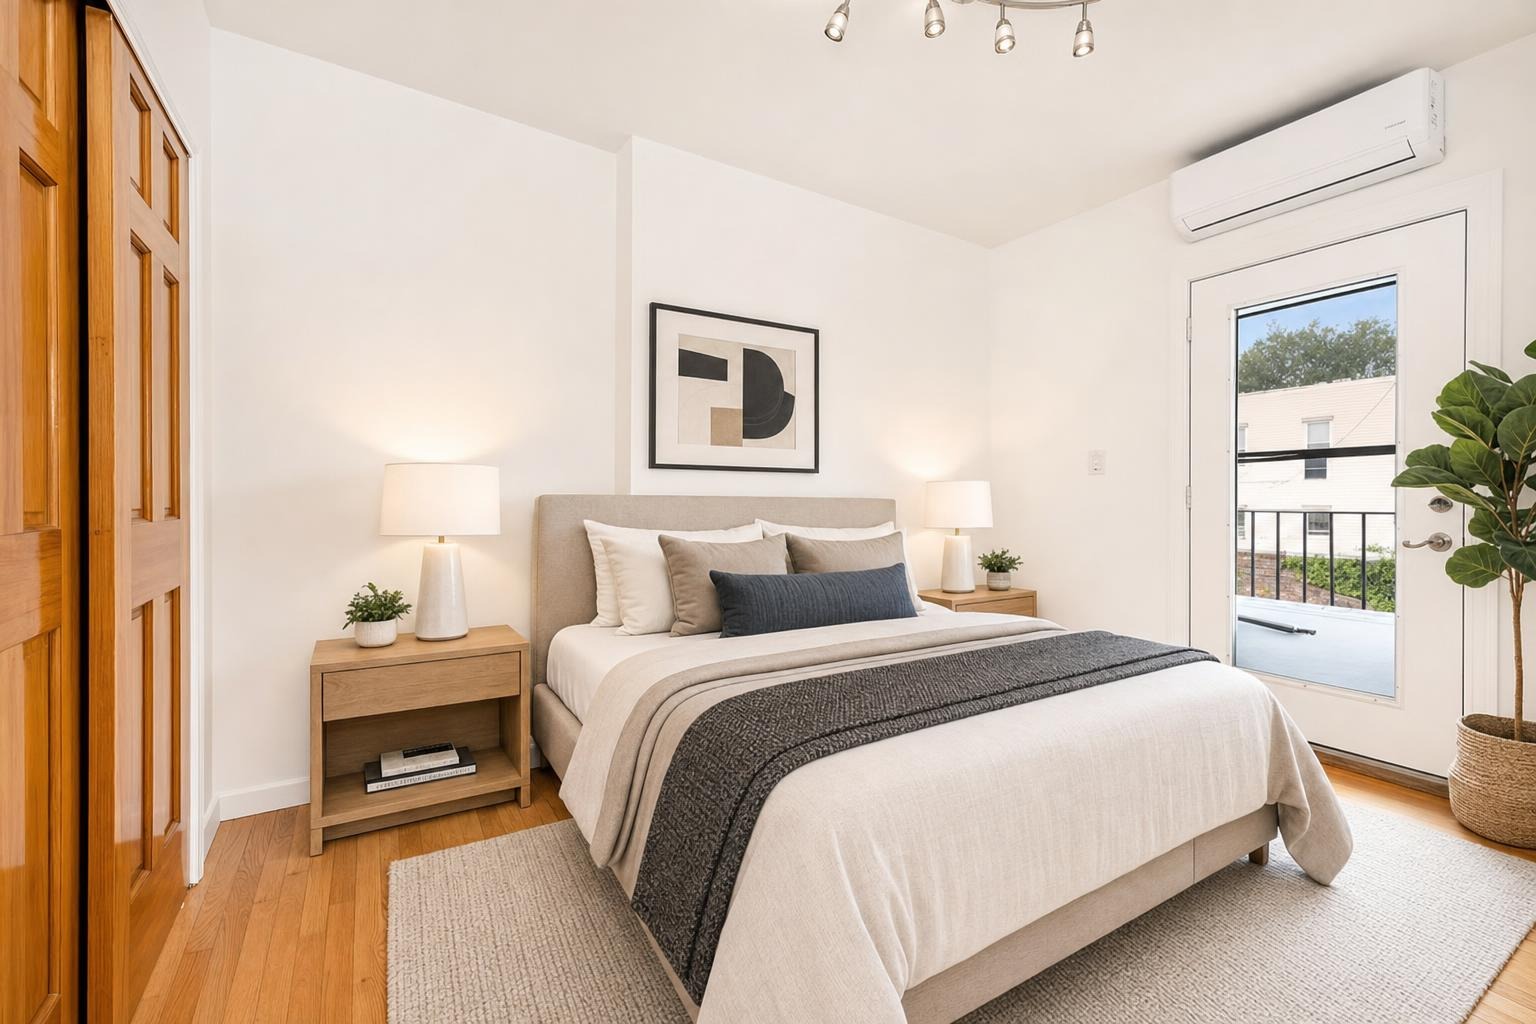
 after · staged
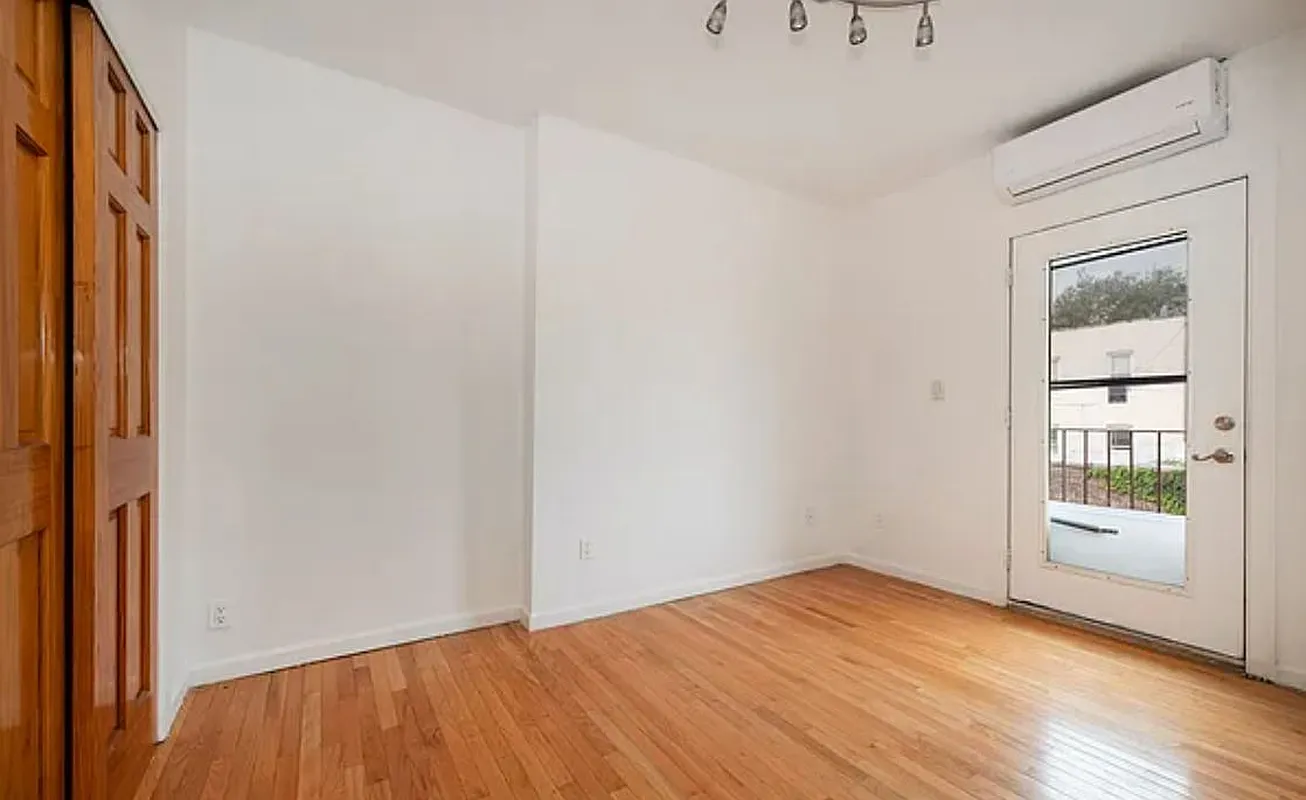
before
after · staged
before
The most common photo mistake isn't a bad shot — it's a missing one. You get home, load the photos, and realize you never captured the second bathroom, or you shot the primary bedroom but forgot the walk-in closet buyers keep asking about. Re-shoots cost you a return trip and delay the listing. A shot list fixes that. Walk the home once, work the list top to bottom, and you leave with a complete set the first time.
Here's the room-by-room list pros use, ordered roughly the way you'd tour the house — which is also close to the order you'll want the photos to appear in the listing. Adapt it to the property; not every home has every room.
Exterior
- Front of house, straight on — the hero/cover candidate. Shoot it with the sun behind you so the facade is lit, not backlit.
- Front at an angle — a three-quarter view that shows depth and the driveway or walkway.
- Backyard — the whole yard from a corner, then any patio, deck, or pool up close.
- Special features — a porch, a view, a garden, a garage, a shed. Anything that adds value gets its own frame.
The front shot is usually your thumbnail, so treat it as the most important photo of the set. Our curb-appeal guide covers getting it right.
Main living spaces
- Living room / great room — two angles: one wide from a corner, one showing how it connects to the kitchen or dining.
- Dining room — from the doorway, across a set table. See dining room staging.
- Family room or den — if separate from the main living room.
- Entry / foyer — first impression of the interior; worth one frame if it's presentable.
Kitchen
- Wide shot — from the doorway, showing the full layout and the island if there is one.
- Second angle — from the opposite corner, so buyers understand the flow and the counter space.
- A detail — a nice range, a farmhouse sink, stone counters, or the breakfast nook. One tight shot of a selling feature.
Kitchens carry outsized weight; give this room three frames, not one. See kitchen staging tips.
Bedrooms
- Primary bedroom — one wide angle from a corner, bed made and centered.
- Walk-in closet — buyers specifically look for this; one clean shot.
- Primary bathroom (ensuite) — shoot it with the mirror out of the direct frame if you can.
- Each secondary bedroom — one angle each. Don't skip the small ones; a missing bedroom reads as "what are they hiding?"
Bathrooms
- Every full and half bath — one frame each, shot to look clean and bright. See bathroom staging.
Bonus & utility spaces
- Home office — increasingly a deal-maker. See home office staging.
- Finished basement or bonus room — one wide shot.
- Laundry room — a quick frame; buyers like knowing where it is.
- Garage — one shot, especially if it's oversized or has built-ins.
- Views — if a window frames something worth seeing, shoot out of it.
Shoot everything, stage it afterward.
You don't need furniture in every room the day you shoot. Capture clean, well-lit frames of each space, then stage the empty or awkward ones later with Stylst — it keeps the real room and adds furniture that fits, about a minute per photo. Just disclose staged images in the listing.
How many photos is that?
Worked through, this list lands most homes between 20 and 35 photos — enough to tell the whole story without padding. That's right in the range that performs best; we break down the numbers in how many photos a listing should have. If you're near or over your MLS's cap, prioritize the exterior, kitchen, main living spaces, and primary suite, and trim the utility shots first.
Before you leave the house
Run one final pass: is every bedroom captured, every bathroom, the kitchen from two angles, and the exterior front? Those are the shots buyers filter and search on, and the ones that trigger a re-shoot if they're missing. Get them in the can, keep the whole set consistent in brightness and color, and you've got a listing that's ready to go live. For the technique behind each frame, see how to photograph a room, and avoid the usual traps in 9 photography mistakes that kill listings.