Landscaping Before/After Photos That Sell the Job
Yards photograph worse than they look. Here's how to shoot the pair, beat the light, and make a finished patio look like the brochure.
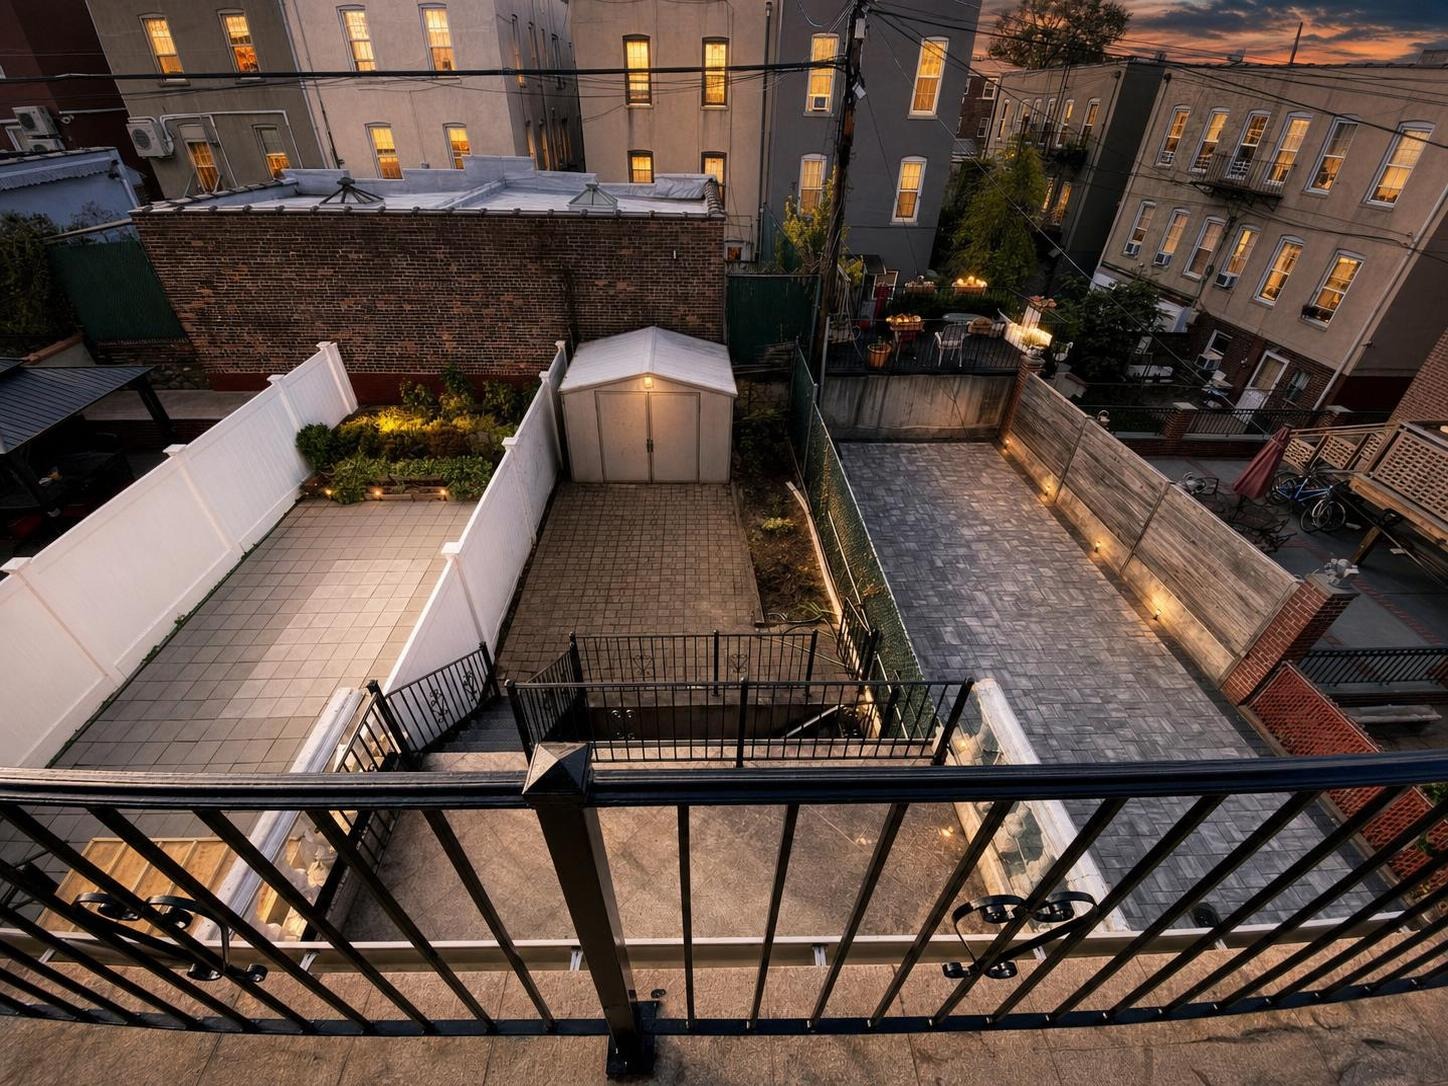
 after · dusk
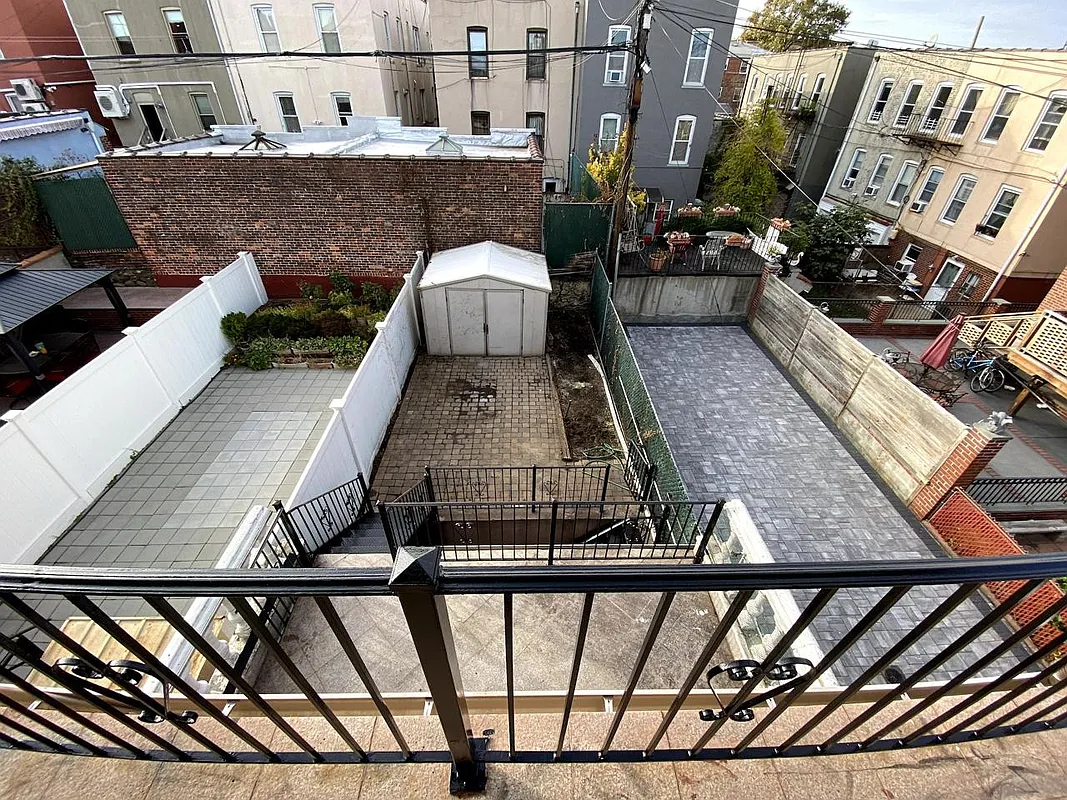
before · midday
after · dusk
before · midday
The short version
Yards photograph worse than they look, and midday sun is why: it flattens the texture you built, blows the sky white and kills the shadow in the stonework. Shoot the before from the street and the door, save the dusk shot, get the money detail as well as the wide, and come back in six weeks.
You finish a hardscape job that took a crew four days. Pavers laid dead level, beds edged clean, new plantings in, the whole yard transformed. You pull out your phone at 1pm, take one shot, and it looks like… a yard. Flat. Green. Nothing.
Landscaping is the hardest trade to photograph, and it has nothing to do with the work. Outdoor spaces have no walls to frame them, no ceiling to bounce light, and a sun that flattens everything at exactly the hour you're finishing up. The result is a photo that shows a lawn and a patio, but not the job.
Shoot the before from the street, and from the door
Two before frames, and you need both:
- The curb frame. Stand in the street, centered on the house, shooting the front yard the way a neighbor sees it. This is the one that sells front-yard work, and it's the frame every prospect in the neighborhood will unconsciously compare their own house to. The composition rules are the same ones in curb appeal exterior photos.
- The house frame. For backyards and patios, stand at the back door or on the deck and shoot out. That's where the homeowner will actually stand, every day, for the rest of the time they own the place. That's the emotional shot.
Mark where you stood. Landscapers lose more before/after pairs to "I can't remember where I took it from" than to any other cause. A fence post, a downspout, the third paver from the door — anything you can find again in a week.
Midday sun is the enemy
Bright overhead sun does three bad things to a yard: it flattens every texture you built (the whole point of stonework is the shadow in the joint), it blows out the sky to white, and it turns grass into a single uniform green with no depth.
The fix is timing. Early morning and the hour before sunset put the sun low, which rakes across the surface and brings back the texture. Overcast is actually fine for planting shots — soft light makes foliage colors read true. Bright noon is the one to avoid, and it's the exact hour crews finish. If you can't come back, shoot anyway and fix the exposure afterward; the reasoning is laid out in the best time of day for exterior photos.
The dusk shot is the one that gets saved
Nothing sells outdoor living like a dusk photo. Warm windows, a deep blue sky, path lights and string lights glowing against the stone. It's the image a homeowner pins when they're daydreaming about their yard, and it converts far better than a bright noon shot of the same space.
You don't have to sit in a truck until 8:40pm to get it. A Day-to-Dusk conversion takes the photo you already shot and relights it as an evening scene — same yard, same hardscape, same plants, same fixtures, different time of day. It's a lighting treatment of a real photo, not a different yard. The mechanics are in day-to-dusk photo conversion and the shooting notes are in DIY twilight photos.
Two rules keep it honest. Don't present a dusk conversion as a photograph you took at dusk, and don't use it to imply lighting the client didn't buy. If you didn't install landscape lighting, the picture shouldn't sell landscape lighting.
Never invent a patio nobody paid for.
It's tempting to drop furniture, a fire pit, and a pergola into a bare backyard photo to "show the potential." For a landscaper that's a trap: the client sees furniture, remembers furniture, and expects furniture. If you're showing a client what a space could become, label it clearly as a concept and say what's actually in the scope. If you're showing finished work, show finished work.
Shoot the money detail, not just the wide
The wide shot proves the transformation. The detail shots prove the craftsmanship, and they're what a serious buyer scrolls to. For a landscape job that means:
- The clean edge where the bed meets the lawn — the single most convincing sign of a pro crew.
- A tight shot of the paver joints, the wall cap, the step tread. Shot at a low angle so the light rakes across it.
- The entry sequence: walkway, steps, door. Sells hardscape better than the whole yard does.
- The view from the new patio, not just of it.
- Anything living: the plant that's going to fill in, the tree you saved.
If the job included a patio or a deck that a homeowner is going to furnish, outdoor living staging and backyard staging cover how those spaces get photographed for listings — the same framing works for a portfolio.
Come back in six weeks
Landscaping is the only trade whose work looks better over time. A planting job on the day you finish is a bunch of small plants in fresh mulch. Six weeks later it's a garden. Put a reminder in your phone for every planting job and go take the real after shot when it fills in — that's the photo that books next spring's work.
It also solves the winter content problem. A lawn-care or landscape company that stops posting in November disappears from the feed exactly when homeowners start planning next year. Shooting a season ahead means you have a stack of green photos to post during the dormant months, and a good reason to be in touch with past clients.
Where the photos go
Google Business Profile first — a huge share of landscape work starts with "landscapers near me," and the photo grid is the first thing a prospect sees. Then Instagram and Facebook, where the before/after wipe video outperforms a static pair, especially for a dramatic hardscape job. Then the estimate: three pairs from yards that look like theirs, printed on the leave-behind. Nothing closes a $14,000 patio bid like a photo of a $14,000 patio you built two streets over.
A short reveal video costs nothing to make from the pair you already shot — see how to make a before/after reel from one photo. The general discipline of shooting the pair is in before/after photos that book jobs.
Where Stylst lands
Stylst runs on your phone at the tailgate. Enhance fixes the flat exposure and washed-out sky in a shot you had to take at noon. Day-to-Dusk turns that same photo into the evening shot you didn't have time to wait for. Declutter pulls the wheelbarrow, the hose, and the pile of empty mulch bags out of the frame. Photos come back in about 30 seconds, at $1 each, pay-as-you-go, no subscription required. If one misses, tell us within 24 hours and we'll re-run it free with your feedback; if it still misses, we credit you back.
Stage a photo from your last yard and see the difference before you post it.
The bottom line
You already did the hard part. The yard is finished and it looks great in person. Take the before from the street and from the back door, mark your feet, come back at the right hour or fix the light afterward, shoot the edges and the joints where the craft shows, and give the good jobs a dusk shot. Then go back in six weeks when it fills in and take the photo that actually books next season.
Questions people actually ask
How do I photograph a finished landscaping job?
Avoid midday sun, which does three bad things at once: it flattens the texture that is the whole point of stonework, blows the sky to white, and drops harsh shadows across the planting. Shoot in the golden hour or on bright overcast, and take both the wide proof shot and the close detail.
Why should I photograph a landscaping job again later?
Because landscaping is the one trade whose work improves with time. Fresh planting looks sparse and the mulch looks raw on the day you finish. Six weeks later everything has filled in and the same yard photographs like the brochure image you wanted. It is the cheapest upgrade to your portfolio available.
Where should landscapers post before and after photos?
Google Business Profile first, because a large share of this work starts with a local search and the photo grid is the first thing a prospect looks at. After that, Instagram and your website, and most importantly inside the quote you send, where a homeowner is comparing you against two other bids.