Before-and-After Photography for Contractors
The transformation is the whole pitch. How to shoot the pair on a job site — and make it look like the work you actually did.
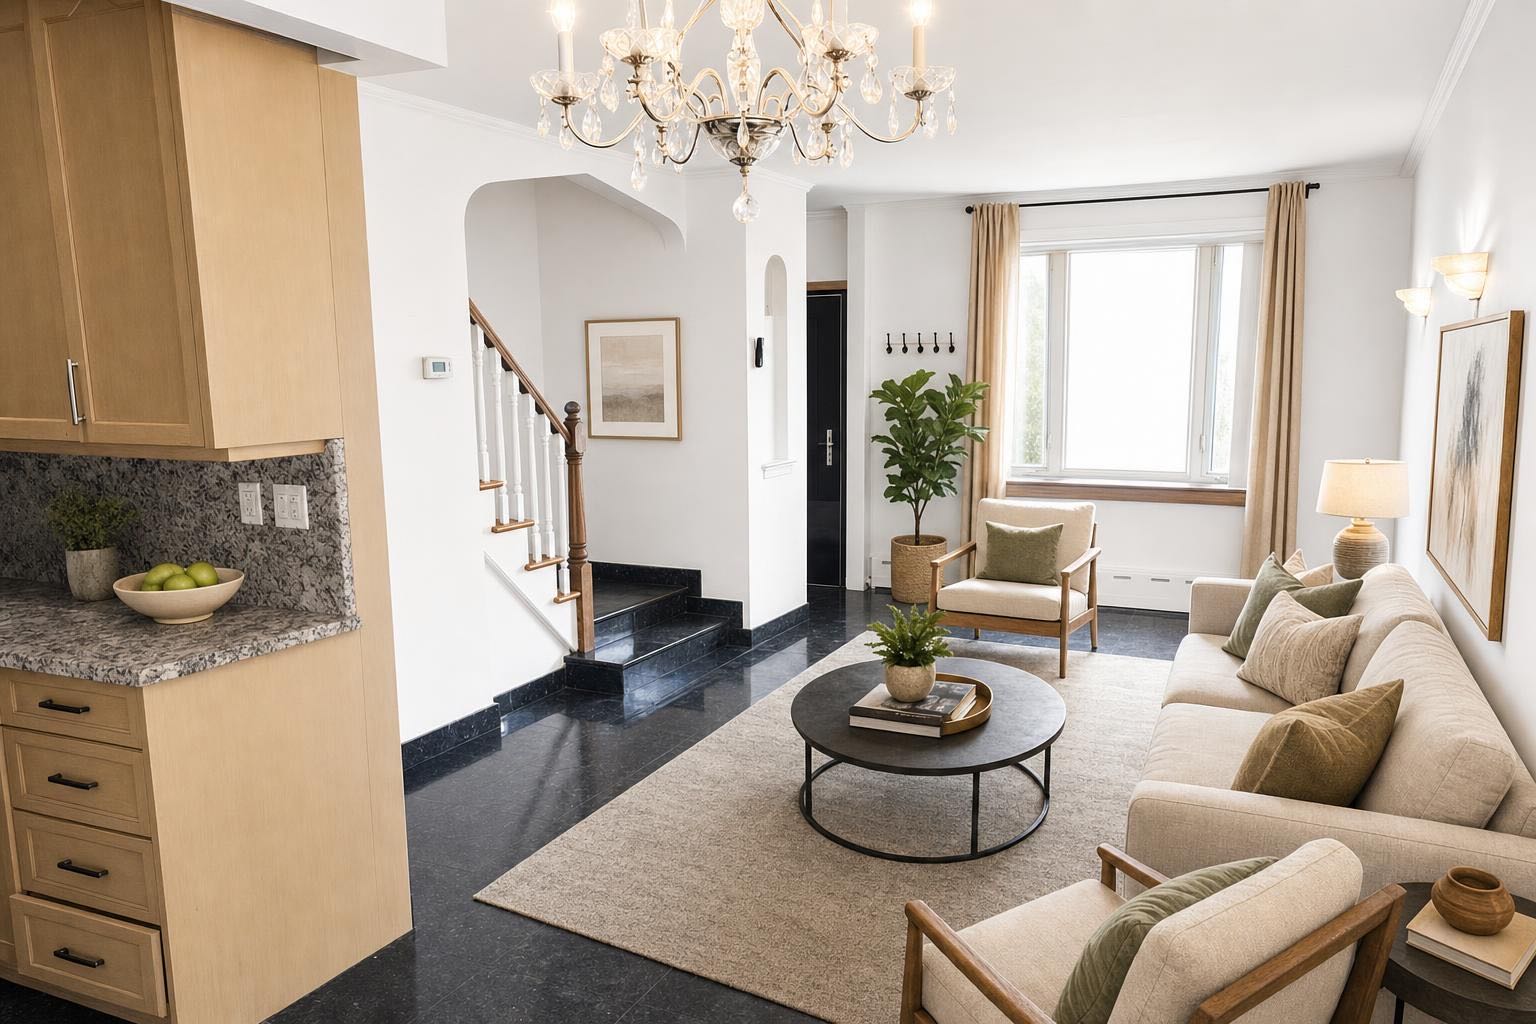
 after
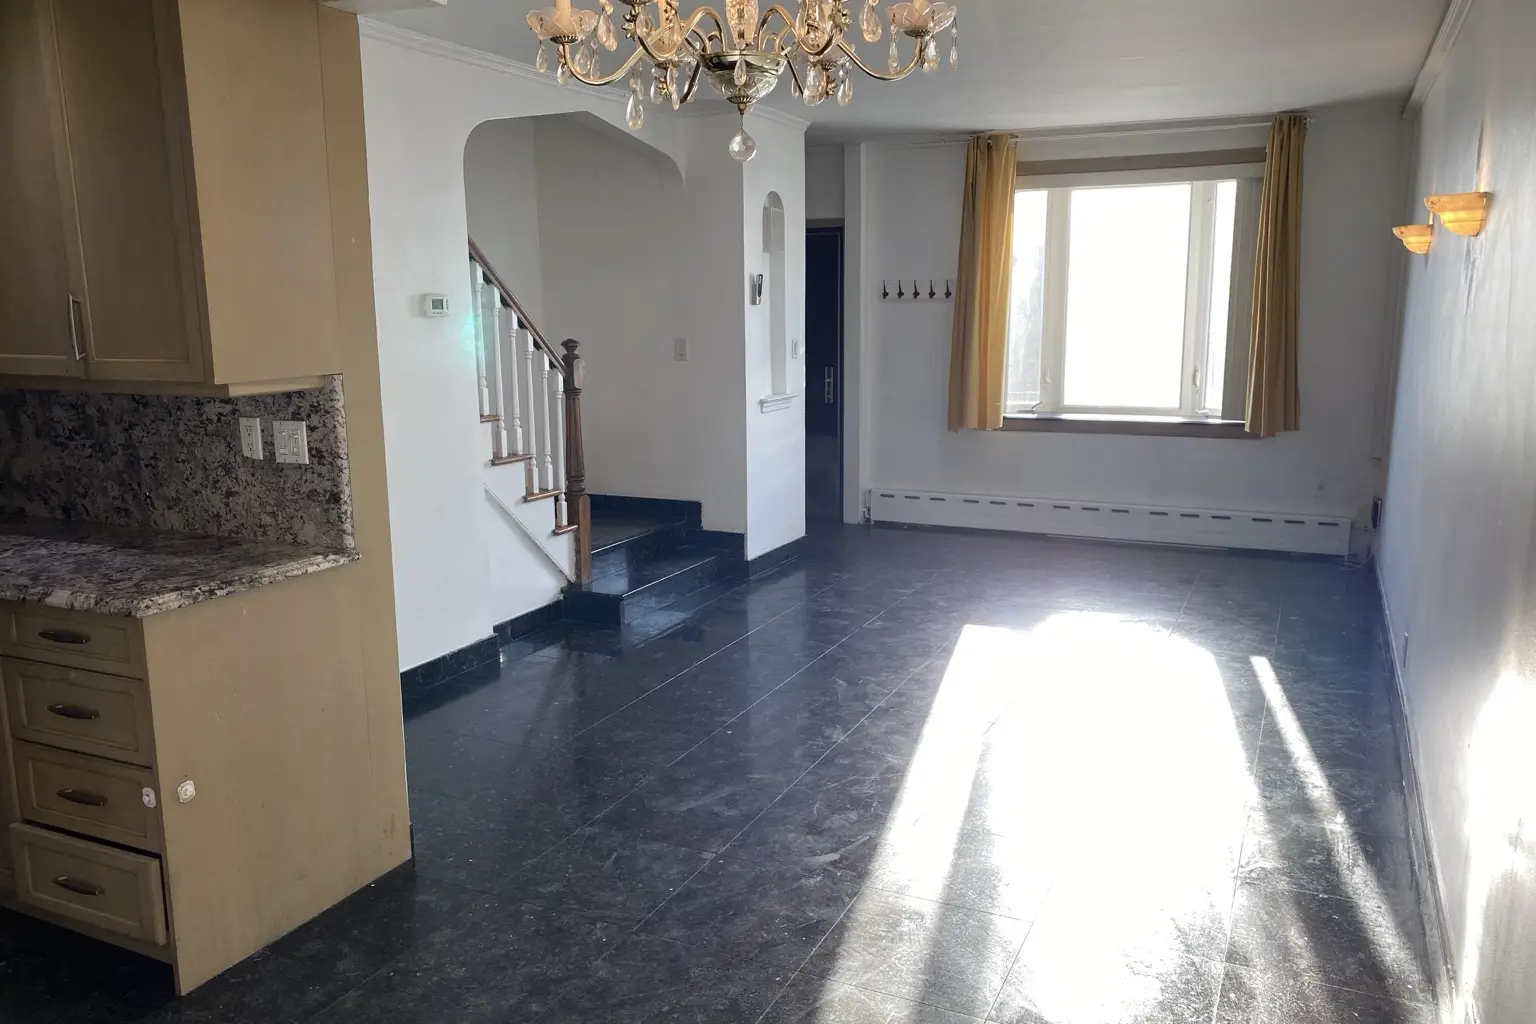
before
after
before
The short version
For a trade, the transformation is the entire pitch. The photo you will regret not taking is the before, so shoot it before the first tool comes out. Then shoot the after from the same spot at the same height, get your equipment out of the frame, and fix the job-site light afterwards.
Nobody hires you off your list of services. They hire you off a photo. Somebody sees a kitchen, a lawn, a repainted stairwell, a bathroom that used to be a disaster, and they think: my place could look like that. Then they call.
Which means the before/after pair isn't marketing decoration. It's the demo. It's the closest thing a trade business has to letting a prospect try the product before they buy it. And most trade businesses do it badly — not because the work is bad, but because the photos are taken by a tired person on the last day of a job, in terrible light, with a ladder in the frame and no "before" shot to compare against.
Here's how to fix that in about ten minutes per job.
Get permission before you photograph
Put photo permission in the project paperwork before work starts, and confirm it again before publishing. State where the images may appear, whether the property or client can be identified, and whether the client can withdraw permission before publication. Avoid faces, family photos, addresses, alarm panels, access codes, license plates, and anything else that reveals private information. Permission to document a job is not automatically permission to use it in an ad.
The before photo is the one you'll forget
Every trade has the same regret: the job came out great, the after photo is gorgeous, and there's no before. Or the before is a blurry vertical snap you took to send the supplier a measurement, shot from a doorway at a weird angle, useless as half of a pair.
Shoot the before before you unload the van. Not after you've moved the furniture, not after demo, not "I'll grab it later." The moment you walk the job the first time, take three minutes:
- One wide shot of the whole space — the hero angle, the one you'll want to reshoot at the end.
- Two or three detail shots of the specific ugliness you're getting paid to fix: the cracked grout, the dead patch of lawn, the peeling sash.
- A note of where you stood. Mark it. A piece of tape on the floor, a fence post, "left corner of the doormat." You need to stand there again.
That's it. The before doesn't need to be pretty — it needs to be the same frame as the after.
Shoot the pair like a pair
A before/after only works if the two photos are honestly comparable. Same spot, same height, same framing, same lens. If the before is shot from the hallway and the after is shot from inside the room with a wide lens, you haven't made a comparison — you've made two unrelated photos, and people can feel it even if they can't name it.
Practical rules:
- Same angle, same height. Chest height, camera level, not tilted down. Tilting makes walls lean.
- Back into a corner and shoot across the long diagonal of the room. It's the single biggest improvement most people can make. There's a full breakdown in how to photograph a room.
- Don't zoom. Use the standard lens, move your feet. Ultra-wide makes a small bathroom look like a funhouse — see wide-angle photography for where the line is.
- Shoot horizontal and vertical. Horizontal for the website and Google Business Profile, vertical for Stories and Reels.
Job-site light is the actual problem
Your work looks better in person than in your photos, and it's almost always light. Job sites have the worst lighting conditions in photography: a blown-out window on one wall, a warm bulb overhead, a blue-white work light on the floor, and a phone camera trying to average all of it into one exposure. The result is a photo that's simultaneously too dark and washed out, with color shifted somewhere between orange and green.
Some of that you fix on site — kill the work lights, open the blinds, shoot with one dominant light source. Some of it you fix afterward. An Enhance pass corrects exposure, white balance, and contrast without adding or removing a single thing from the room, which is exactly what a photo of real finished work needs. The basics are in photo editing basics, and they apply the same whether the room is a listing or a completed remodel.
Get your stuff out of the frame
Look at your last ten "after" photos. Count the extension cords, blue tape, drop cloths, product bottles, shop vacs, a stepladder half out of frame, a Gatorade on the counter. Every one of those tells the client the job isn't finished — even when it is.
Declutter removes the junk while leaving the real room alone: the furniture stays, the fixtures stay, your tools and cords go. It's the highest-leverage edit in the trades, because it's the difference between a snapshot of a job site and a photo of a finished space. The declutter checklist is written for listings, but every line of it applies to a finished job.
The one line you can't cross.
Fixing light, straightening the frame, and removing your own equipment are honest edits of real work. Editing out a defect you didn't fix, or adding a finish you didn't install, is a lie — and in a trade, a lie that gets discovered on site. If you add furniture that isn't there, say so in the caption: "virtually staged." Same norm the real estate world uses, covered in is virtual staging legal?
Where the photos actually get used
Organize each job in one folder with a consistent project name, separate before, progress, and after groups, and keep the matched hero pair together. Save the original files as evidence; export resized copies for each channel.
Trade photos don't live on the MLS. They live in five places, and each wants something slightly different:
- Google Business Profile — the highest-intent audience you have. Somebody searched "kitchen remodeler near me" and is comparing three companies by photo. Post the hero and the pair. Horizontal.
- Instagram and Facebook — the before/after carousel and the reveal video. Vertical.
- Houzz, Angi, Thumbtack, Nextdoor — your portfolio is the profile. Thin galleries lose to fat ones.
- The quote leave-behind — three or four strong pairs on one page, stapled to the estimate. This is the most underused sales asset in the trades.
- The follow-up text — "here's a job we finished last week that's a lot like yours." Closes stalled estimates.
Make the pair move
A static before/after gets a scroll-past. The same pair as a short wipe video — the before sliding away to reveal the after — gets watched to the end, because people wait to see the reveal. It's the one video format that works without a face, a voiceover, or any editing skill.
Stylst renders one from a single photo pair for free: a before/after reel from one photo. If you've finished a whole job, several photos can be stitched into one project reel that walks a viewer through the finished space.
By trade, it's the same discipline
The details change but the loop doesn't. Landscapers fight flat midday sun and yards that photograph as a green blob. Painters fight the fact that fresh paint is nearly invisible on camera unless the light rakes across it. Cleaning and restoration companies have the strictest honesty rules of anyone, because their entire proof is the pair. Remodelers finish one job a month and throw away most of the content it could have produced. And any trade quoting work can use a renovation preview to show the client the finished room before they sign.
Where Stylst lands
Stylst is an app for the phone in your pocket. Snap the finished room, pick a tool — Enhance to fix the light, Declutter to pull your gear out of the frame, Day-to-Dusk for an exterior, Stage if the space is empty and needs furniture to read — and you get a clean photo back in about 30 seconds. It's $1 a photo, pay-as-you-go, no subscription and no account on mobile. The reveal reel, the captions, and the brand kit that puts your company name and phone number under the photo are free.
If a photo comes back wrong, tell us within 24 hours and we'll re-run it free with your feedback; if it still misses, we credit you back. Stage a photo and see what your last job actually looks like.
The bottom line
Your craftsmanship is the product. The photo is the pitch, and right now the pitch is probably underselling the product. Take the before shot before you start. Stand in the same place at the end. Fix the light, clear your gear out of the frame, keep the edits honest, and put the pair where clients are already looking. That's the whole system, and it fits in the ten minutes you spend loading the van.
Questions people actually ask
How do I take before and after photos on a job site?
Take the before first, every time, because it is the one everybody forgets and it cannot be recreated once you have started. Then shoot the after from the same position, at the same height, at the same focal length. A pair only works as proof if the two frames are honestly comparable.
Why do my finished-work photos look worse than the job?
Almost always light. Job sites have mixed lighting, harsh work lamps and windows that blow out, and a phone camera balances for the brightest thing in the frame. Turn on the room lights, shoot when the natural light is even, and correct brightness and color afterwards. Your craftsmanship photographs badly under bad light, not because of the work.
Where should tradespeople actually post before and after photos?
Not on the MLS. They live on your Google Business Profile, your website, Instagram and Facebook, and in the quote you send the next customer. That last one converts hardest, because a homeowner comparing three quotes is looking for evidence and you are the only one who showed them the work.