Real Estate Photo Editing: The Basics That Matter
You don't need Photoshop skills. A handful of simple edits separate a flat phone photo from a listing-ready one.
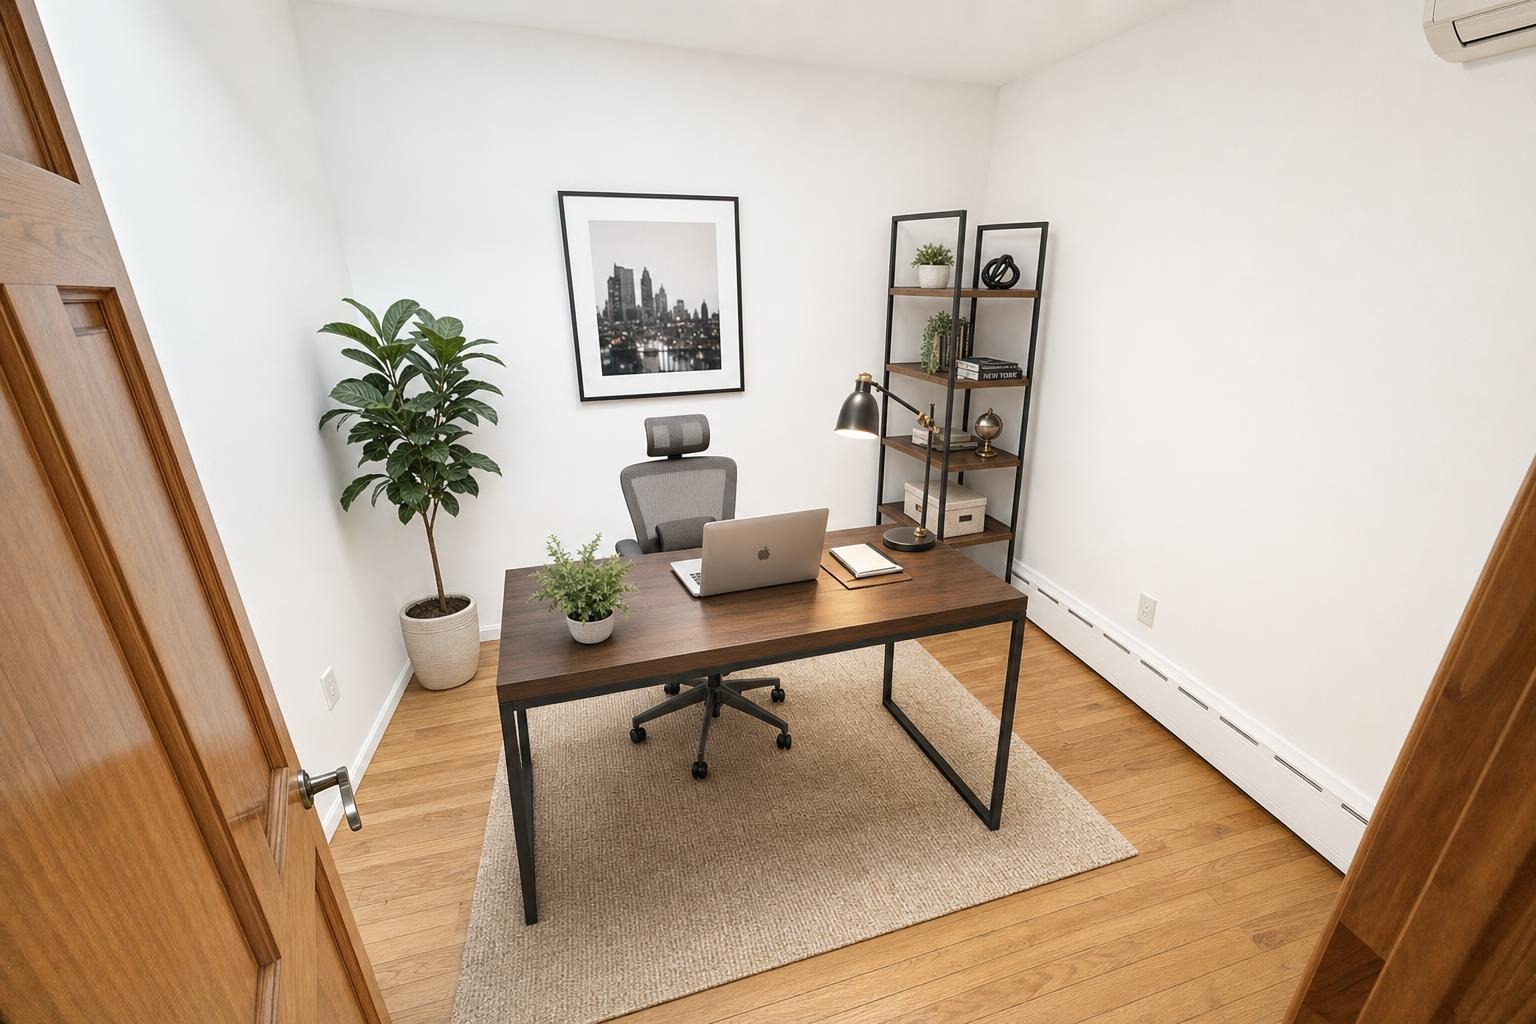
 after · staged
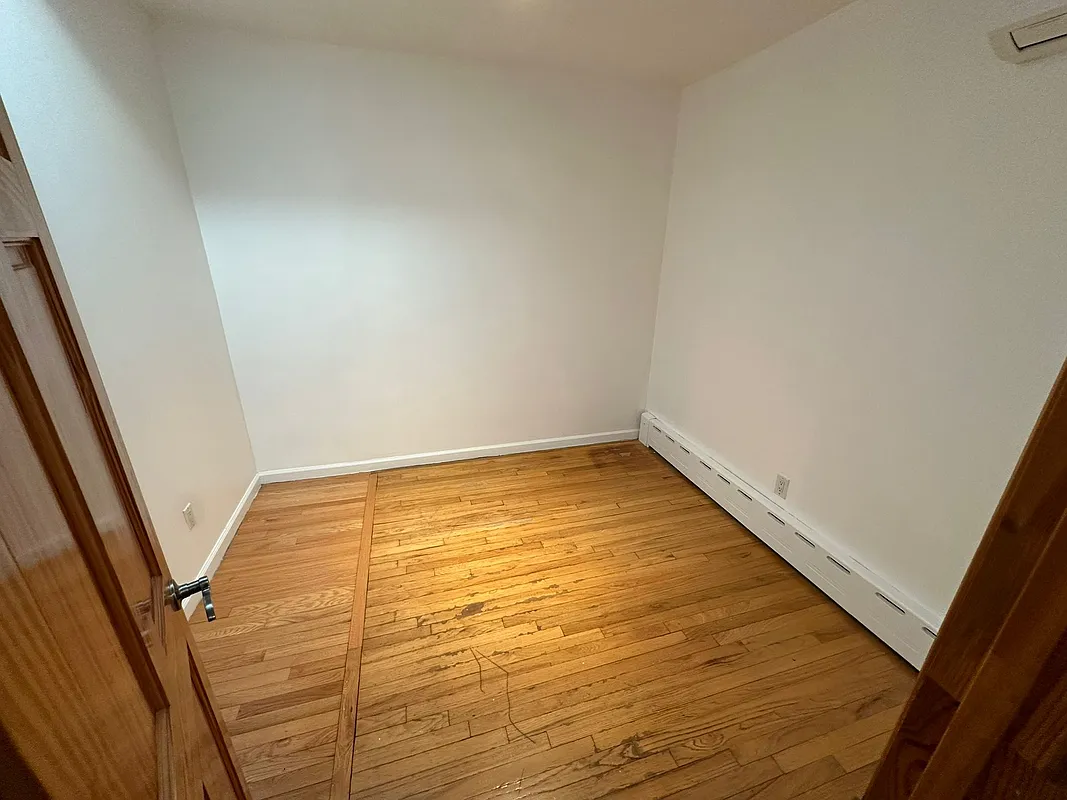
before
after · staged
before
Great listing photos are made twice — once when you shoot them and once when you edit them. The shooting part gets all the attention, but a handful of simple edits are what separate a flat, slightly-too-dark phone snap from a photo that looks professionally produced. You don't need to master Photoshop or pay an editor. These are the basics that actually move the needle, and the one line you shouldn't cross.
Exposure: get it bright
The single most common problem with amateur listing photos is that they're too dark. Rooms look bigger, cleaner, and more inviting when they're bright. In any editing app — even your phone's built-in editor — nudge:
- Exposure / brightness up until the room reads light and airy, stopping before the windows blow out to pure white.
- Shadows up to open dark corners so the room doesn't feel cave-like.
- Highlights down a touch if the windows are too hot, to recover some of the view outside.
A lot of "dark room" problems start at capture; shooting at the right time of day means you're brightening a little, not rescuing a lot.
White balance: kill the color cast
Indoor light makes photos go orange (warm bulbs) or blue (shade and overcast). A room with an orange or blue cast looks dingy even when it's spotless. Set the white balance so the whites in the photo — trim, cabinets, ceilings — actually look white. Most editors have a temperature slider; warm it up if the room's too blue, cool it down if it's too orange. This one correction can transform how clean a space looks, and it matters a lot in kitchens and bathrooms full of white surfaces.
Straighten the verticals
Walls should be vertical and horizons level. Tilted verticals — walls that lean in or out — are the biggest tell of an amateur photo, and they happen whenever you angle the camera up or down. Fix them with:
- The straighten/rotate tool to level the horizon.
- Perspective or "vertical" correction to push leaning walls back upright.
Better still, shoot level in the first place — chest height, camera straight — so there's less to fix. Our phone-only photography guide covers the technique.
Edit honestly.
Brightening, color-correcting, and straightening are fair game — they make the photo match reality. Removing a permanent flaw (a crack, water stain, or power line), erasing a neighboring building, or changing what the property actually is crosses into misrepresentation and can get a listing pulled. Enhance the photo, don't fake the house.
Lens correction and a light crop
Phone ultra-wide lenses bend straight lines near the edges. A lens-correction toggle (in most editors) flattens that bow so the room looks true. After that, a small crop to clean up the edges and improve the composition is usually the last touch. Don't over-crop — you'll lose resolution the MLS wants. Speaking of which, keep an eye on MLS photo requirements for size and format so your edited files actually upload cleanly.
Keep it consistent across the set
A listing's photos should look like they belong together. Edit the whole set to a similar brightness and color temperature so scrolling through them feels cohesive, not like a patchwork of different cameras. Consistency reads as professional even when the individual shots are simple.
Where editing ends and staging begins
Editing fixes how a room is captured; it can't add what isn't there. An empty room edited perfectly is still an empty room. That's where virtual staging comes in — it adds believable furniture and life on top of a clean photo. The two work together: a well-exposed, color-correct photo is the ideal starting point for staging. More on how that works in AI virtual staging: how it works.
Where Stylst lands
Stylst rolls the basics — brightening, color, decluttering — into the same one-minute pass that stages the room, for around a dollar a photo. You hand it a raw phone shot and it returns a corrected, staged, listing-ready image, no editing app required. It's pay-as-you-go, no subscription, and on Google Play. Try it on a room.
The bottom line
You don't need to be a retoucher. Brighten the exposure, correct the white balance, straighten the verticals, flatten the lens distortion, and keep the set consistent — that's 90% of professional-looking listing photos. Just keep your edits honest: enhance what's there, never invent what isn't.