Before/After Photos for Cleaning and Restoration Companies
The pair is your entire product demo. Here's how to shoot it without the cringe — and without ever faking a clean.
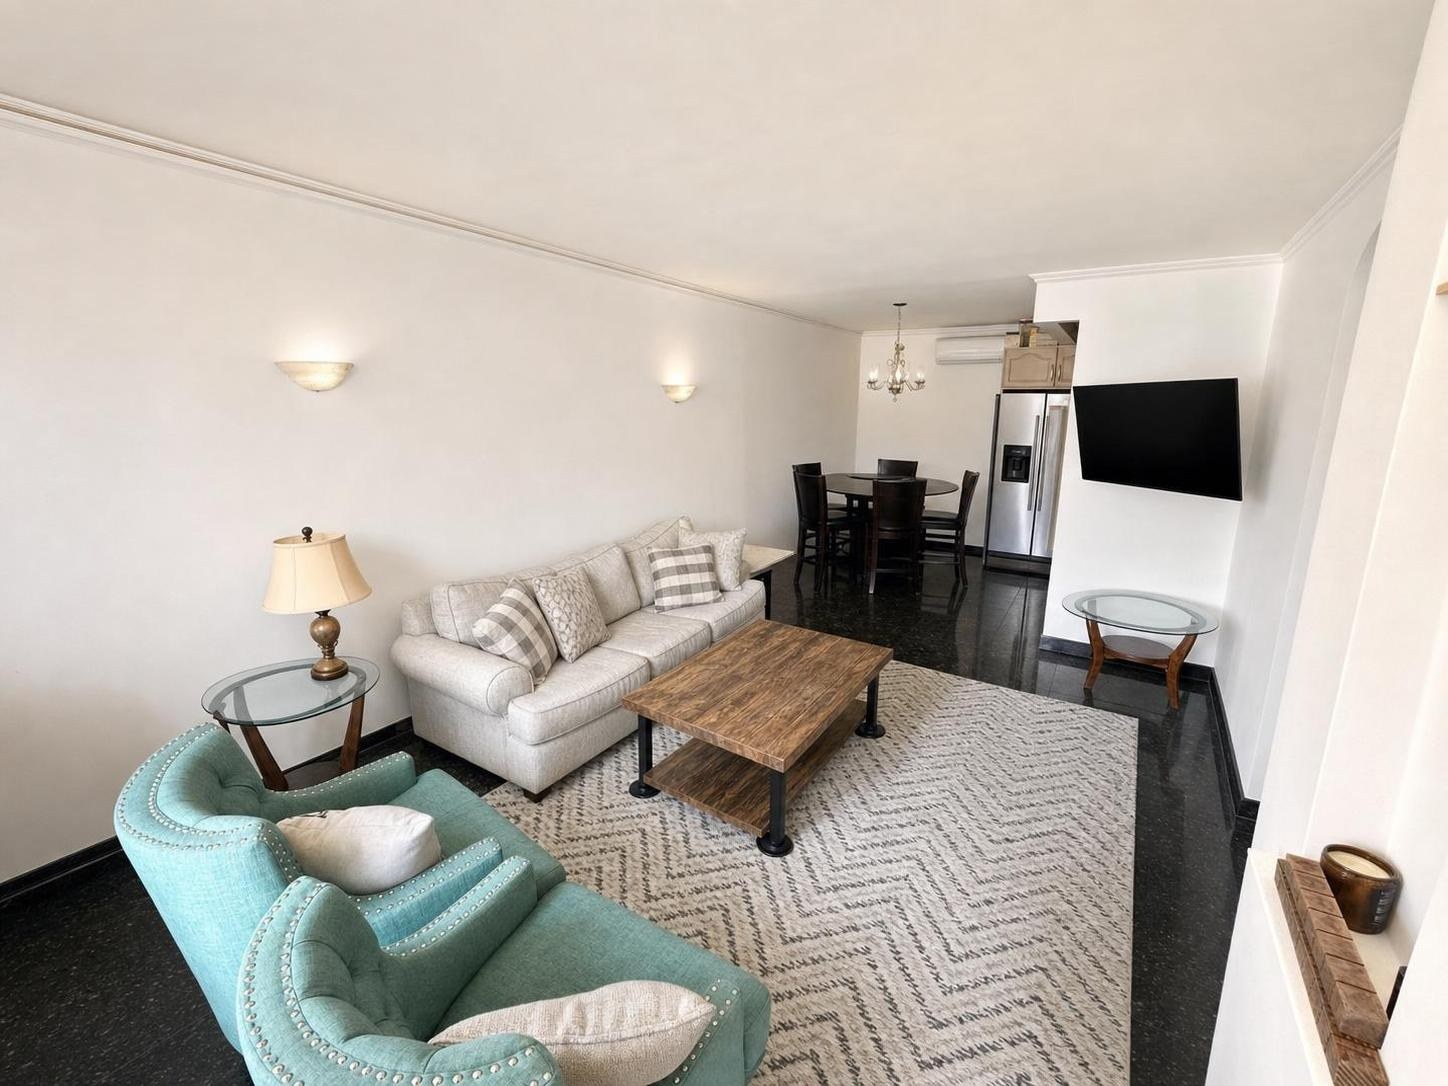
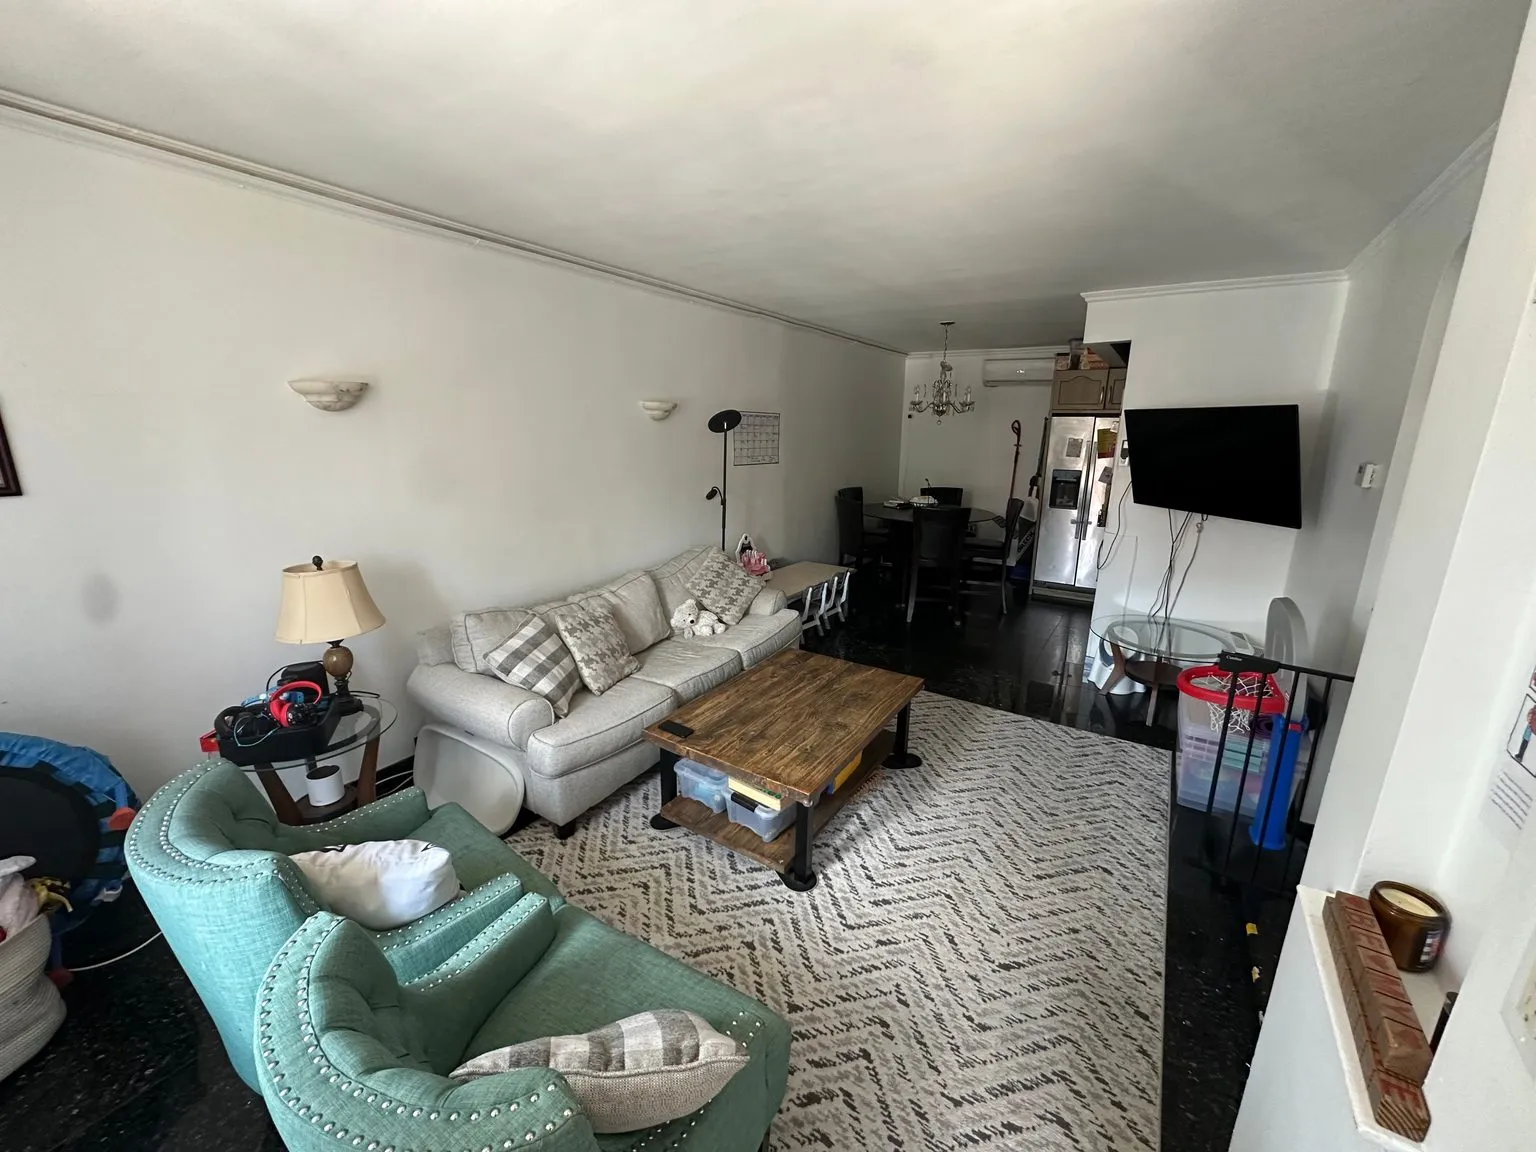 after
before
after
before
The short version
For a cleaning or restoration company the before and after pair is the entire product demo, which means it has to be beyond suspicion. Never fake a clean. Shoot both frames from the same spot, let the detail shot carry the proof, and get permission before you publish the inside of someone's house.
Every trade has a marketing problem. Yours is the worst one: a clean room looks like a room.
A remodeler can photograph a new kitchen. A landscaper can photograph a patio that wasn't there before. You spent five hours on a move-out clean, and the finished photo shows… an ordinary empty apartment. There's nothing in the frame that proves you were there.
Which is why the before/after pair isn't one of your marketing formats. It is your marketing. Without the before, the after has no meaning. And that dependence puts a lot of pressure on the pair being genuinely, obviously, boringly honest — because in your business, a photo that looks staged is a photo that says you can't actually do the work.
The line you never cross
Start here, because everything else is downstream of it.
Never edit a stain out of an "after" photo. Not the ring you couldn't lift. Not the scorch on the counter. Not the soot line you didn't finish. If it's still there in the room, it's still there in the photo.
In most trades, an over-edited photo is embarrassing. In yours, it's fraud — you'd be showing a prospective customer a result you did not produce, in the exact category where the result is the product. And it gets caught immediately, because the person who hired you walks into that room the same day.
An honest cleaning photo is a photo of a genuinely clean room, taken well. That's it. Everything below is about the "taken well" part.
Which edits are legitimate
Plenty. Fixing how a photo was captured is not the same as changing what it shows.
Fair game:
- Exposure and white balance. Bathrooms and basements are lit by one sad overhead bulb. Correcting the light so the room reads the way it looked to your eyes is honest — the room really is that clean, the camera just couldn't see it.
- Straightening and cropping. Level the horizon, fix the lean.
- Removing your own equipment. The extractor hose, the caddy, the cords, the shop vac, the spray bottles lined up on the counter. That's your gear, not the customer's room, and it doesn't belong in a finished photo.
Not fair game:
- Removing dirt, stains, soot, mold, or damage from the after photo.
- Adding dirt or darkening the before to make the contrast look bigger.
- Adding furniture or decor to a room you cleaned and calling it your result. If you ever do add furniture — for a listing, say, or a landlord's marketing shot — it must be labeled "virtually staged," the same norm covered in the 2026 disclosure rules.
The tell that ruins a cleaning before/after.
A dark, yellow, phone-flash "before" next to a bright, wide, well-lit "after." People can't always articulate it, but they feel it — and the conclusion they reach is that the difference came from the camera, not the crew. Shoot both frames the same way, in the same light, from the same spot. A pair that's identically lit and still shows a dramatic difference is 100× more convincing than a pair you juiced.
Shoot the pair like a pair
The technique is a discipline, not a skill:
- Same spot, same height. Chest height, camera level. Put a piece of tape on the floor if you have to. If you shoot the before from the doorway and the after from inside the room, you have two photos, not a pair.
- Same light. Same lamps on or off, same blinds, same time of day if you can. This is the honesty test and the credibility test at once.
- Same framing. Don't zoom in on the after. Don't go ultra-wide on the after. The room should be identical; only the state of it changes.
- Shoot before the crew starts. Not after you've moved the couch, not after the first pass. The moment you walk in.
- Vertical and horizontal. Vertical for Reels and Stories, horizontal for your Google Business Profile.
The framing fundamentals are the same ones listing photographers use — how to photograph a room and photo editing basics cover the whole toolkit — and the general job-site version is in before/after photos that book jobs.
The detail shot is where you win
Wide shots prove the room got cleaned. Detail shots prove you cleaned it. Get in close:
- The grout line. The single most persuasive cleaning photo that exists.
- The oven rack, the glass, the burner pan.
- The carpet edge at the baseboard, where the traffic line lives.
- The shower door track. Anyone who has ever cleaned one will feel it in their chest.
- The dryer vent, the range hood filter, the fridge coils — the stuff a homeowner has never once looked at.
The half-and-half frame — one shot where the left half is cleaned and the right half isn't yet — is the strongest single image your business can produce. It removes every doubt about angle and light because there's only one photo, one moment, one camera. It's a real technique with a real constraint: shoot it before you finish the second half.
Restoration is a document trail as well as marketing
Fire, water, and mold work needs photos for the adjuster, not just for Instagram. Those two jobs overlap but they aren't the same, and it's worth being deliberate:
- Document everything on arrival — wide frames of each affected room, tight frames of each damaged surface, before you touch anything.
- Keep the originals. Unedited. For the file, an edited photo is a weaker photo, even if the edit is honest. Edit copies for marketing; keep the originals as the record.
- For marketing, pick the pairs where the transformation is visible and the customer has agreed to it. Which brings us to the thing most companies skip.
Ask before you post someone's bathroom
The person whose house you cleaned did not agree to have the worst room in it published to 4,000 strangers. Get a yes — a text message is fine — and never post anything identifiable: house numbers, mail on the counter, kids' photos on the fridge, the framed diploma. A dramatic before is not worth a furious client and a one-star review that says you humiliated them online.
If in doubt, crop tight. A grout line has no address.
Where the photos go
Google Business Profile is the priority for cleaning and restoration — most of your customers are searching locally with high intent and comparing three companies by photos and reviews before they call anyone. Then Facebook and Instagram, where the before/after wipe video outperforms a static pair, especially for a dramatic job. It costs nothing to make one from a pair you've already shot: a before/after reel from one photo.
And if you work with landlords or property managers, the turnover clean is a natural bundle — a clean unit that photographs well rents faster, which is the argument in photos for property managers and rental listing photos.
Where Stylst lands
For a cleaning company the two tools that matter are the honest ones. Enhance fixes exposure and white balance so a genuinely clean bathroom stops looking like a dim yellow cave — it adds nothing and removes nothing. Declutter pulls your equipment out of the frame while leaving the room exactly as it is.
You should almost never use Stage on a cleaning photo — furniture that isn't there muddies the one thing you're trying to prove. Photos come back in about 30 seconds, $1 each, pay-as-you-go, no subscription, no account on mobile. If one comes back wrong, tell us within 24 hours and we'll re-run it free with your feedback; if it still misses, we credit you back. Run a photo from today's job.
The bottom line
Your product is invisible, so the pair has to do all the work — which means the pair has to be beyond suspicion. Same spot, same light, same frame. Fix the exposure, clear your own gear out, and never touch what's actually in the room. An honest before/after of a genuinely clean space, shot properly, is the most persuasive thing a cleaning company owns.
Questions people actually ask
What edits are acceptable on cleaning before and after photos?
Anything that corrects the photograph rather than the result. Brightening a dim basement, correcting the color cast from fluorescent lights, and straightening the frame are all fine and often necessary. What you can never do is edit the dirt out of the before or the damage out of the after, because then the pair is not evidence of anything.
How do I shoot a convincing before and after pair?
Same position, same height, same focal length, same lighting if you can manage it. The pair only reads as proof when the two frames are honestly comparable, and a viewer notices immediately if the after was taken from three feet closer. Take the before first, because it is the one that cannot be recreated.
Do I need permission to post photos of a customer's home?
You should get it, explicitly, before you publish. The person whose house you cleaned did not agree to have its worst room shown to thousands of strangers, and restoration work in particular tends to be photographed at someone's genuinely bad moment. Ask, keep it anonymous, and never include anything that identifies the address.