How to Photograph and Stage a Finished Basement
A finished basement is square footage buyers don't believe until they see it. The photos are hard for four specific reasons — and one of the fixes people reach for is fraud.
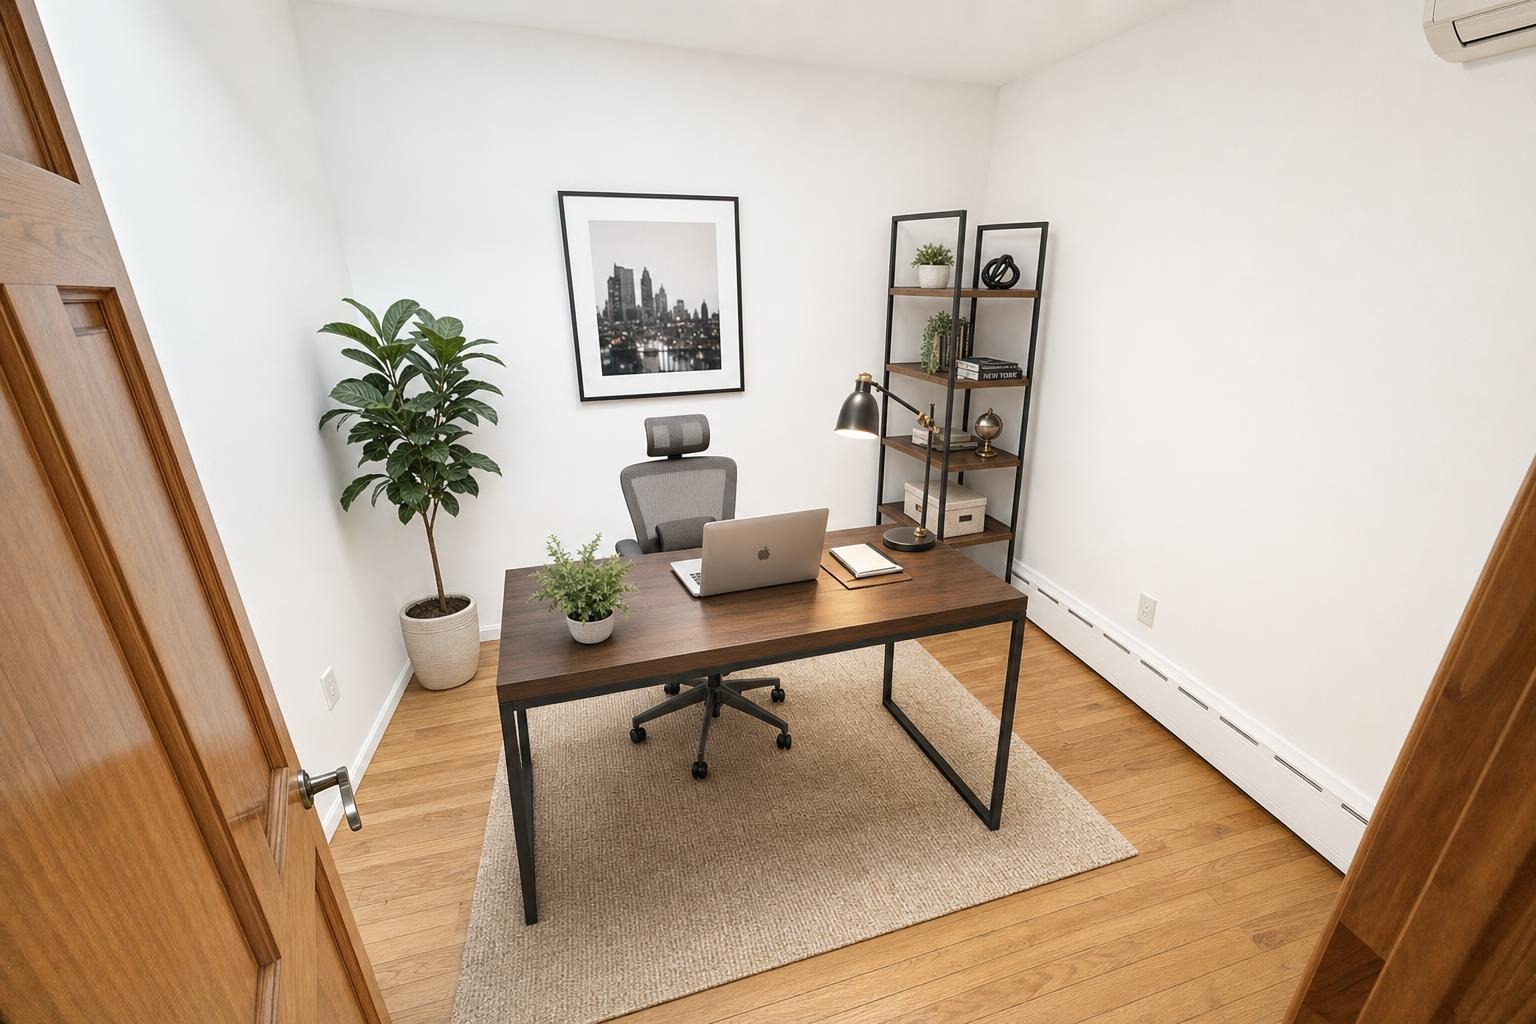
 after
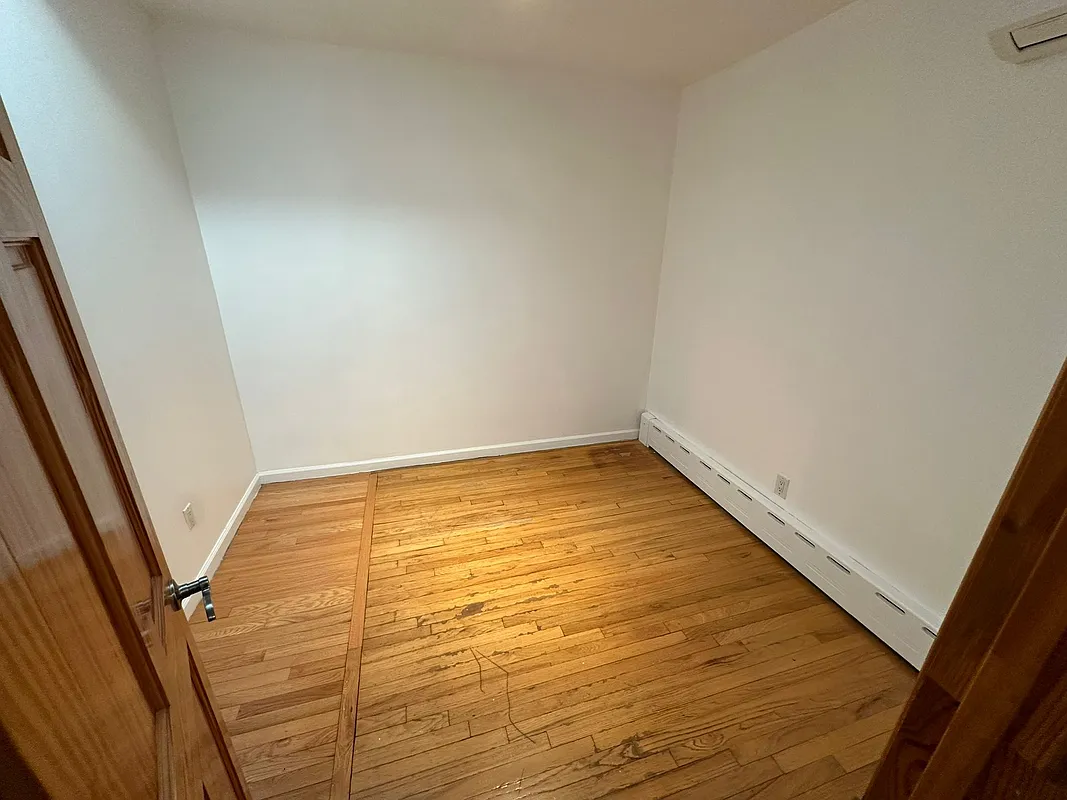
before
after
before
The short version
A finished basement is square footage buyers do not believe until they see it, and the photos are hard for four compounding reasons: low ceilings, no daylight, mismatched bulbs and a room with no obvious purpose. Fix the light first, stage it as living space rather than storage, and never edit out evidence of water.
Nobody argues about the kitchen photo. Every listing has one, everyone knows what it's for.
The basement is different. Half the listings I see either skip it or run one dim, tilted frame shot from four steps down the staircase, which is somehow worse than skipping it. And the copy right above those photos says finished lower level, 700 additional square feet — a claim the photos don't support.
That's the whole problem: a finished basement is square footage buyers don't believe until they see it. Photograph it badly and you haven't just wasted three frames, you've undercut the number in your own description.
Why basement photos come back bad
Four things, and they compound.
Low ceilings. A seven-foot ceiling reads as oppressive in a frame that contains a lot of ceiling, even when the room is comfortable to stand in.
No natural light. Everything a phone camera does well, it does with daylight. Take that away and it starts guessing — noise, grain, mushy shadows, colors that drift.
Mixed color temperature. This is the one people miss. Basements accumulate bulbs: a warm incandescent in the stairwell, a cool LED in a ceiling can someone replaced last year, a daylight-balanced shop light over the workbench. Your eye normalizes all of that in a second. The camera does not — you get one white balance for a room lit by three, so half the frame goes orange and the other half goes blue, and no amount of post-processing untangles it cleanly.
Storage bleeding into the frame. Most finished basements are only mostly finished. The holiday bins, the spare fridge, the treadmill with laundry on it — they live at the edges of the room you're selling as living space.
Fix the light before you fix anything else
Buy a box of bulbs and make every bulb in the basement the same color temperature — 3000K to 4000K is a safe, neutral choice that photographs clean. It costs twenty dollars and does more for your photos than any camera setting.
Then turn on everything: every ceiling can, every lamp, the stairwell, the closet. Under-lighting is the default failure and there's no such thing as too even.
Then hold the camera still. Put the phone on a small tripod, or on a stack of books, and use the timer. A still camera can take a longer exposure, and a longer exposure is how you get a clean, bright, low-noise frame without inventing light that isn't there.
What you should not do is fire a flash. Bounced off a seven-foot ceiling it creates a hot white spot overhead and drops everything at knee height into shadow — precisely the look people mean when they say a photo looks like a basement. A tripod and two seconds of exposure beats it every time.
One more light, if you have it.
If the basement has an egress window or a walkout door, shoot in the middle of the day and get that light into the frame. A visible window is worth a paragraph of listing copy — it answers the question every buyer is quietly asking about a lower level.
Where to stand
Not on the stairs. The staircase shot is the most common basement photo and the worst available angle: you're above the room looking down, which flattens it, exaggerates the floor and puts a handrail through the frame.
Stand in a corner instead, at about chest height, and shoot across the long dimension of the room. Corners give you the most depth a small space has. Chest height keeps the perspective natural — higher tilts down and shrinks the floor, lower tilts up and makes the ceiling loom.
Keep the camera level so the verticals stay vertical, and compose so the ceiling takes as little of the top of the frame as you can manage. You're not hiding the ceiling height — a buyer will measure it with their own head — you're just not devoting a third of the photo to it. The small-room playbook applies here almost line for line.
The general room-by-room approach holds down here too; the basement just punishes sloppiness harder.
Name the space
Here's a free improvement: stop calling it bonus space.
Bonus space asks a buyer to imagine something, and most buyers won't do that work. A named use does the imagining for them. Family room. Guest suite. Home office. Home gym. Pick one per area, say it in the listing copy and again in the photo caption, and stage the photo to match.
If the basement holds two uses, photograph it as two: one frame that reads as a family room, one that reads as an office. Two labelled frames beat three ambiguous ones.
Stage it as living space, not storage
An empty basement reads as storage by default. That's the gravitational pull you're fighting, and furniture is what fights it.
What works down there: a rug, which separates the floor from the concrete underneath it. Table lamps, because light at seated height makes a room feel like a room instead of a bunker. Seating arranged toward a focal point — a TV wall, a fireplace, a window. Art at eye height on the largest blank wall. Warm materials, because basements skew cool and hard.
What doesn't: shelving full of bins, anything that stacks, and any arrangement that leaves the perimeter looking like a staging area. The declutter pass matters more here than anywhere else in the house, because the difference between finished and finished-ish is entirely visible at the edges of the frame.
If the space is genuinely a home office — a small windowless room like the one in the photo above — the list is short: desk, chair, lamp, a shelf, one plant. Office staging works well below grade, because an office doesn't need a view.
The line you don't cross
Now the part that matters more than every photography tip above it.
Declutter clears clutter. It does not clear problems. A moisture stain on the wall, efflorescence chalking on the foundation, an exposed sump pump, a support post in the middle of the room, a visible crack — none of those get edited out. Not with a tool, not with a photographer, not with a brush.
That is misrepresentation, not staging. And practically speaking it's the dumbest possible fraud, because the buyer arrives with an inspector whose entire job is finding the thing you painted over. All the edit buys you is a furious buyer at the point in the deal where fury costs the most.
The same honesty applies to what you're tempted to shoot around. Ceiling height is what it is — if it's six foot eight, don't compose a frame that implies eight feet. And if a room downstairs is being marketed as a bedroom, buyers, inspectors and in many places the code will ask about an egress window, so don't call something a bedroom in a caption that isn't one in the plans. If you're unsure how far your MLS lets editing go, the requirements are worth reading.
Which tool to use
Two situations, two different answers.
The basement is empty. Use Stage — and pick the room type that matches the use you're marketing, not the floor it's on. Home office, living room, bedroom. There's no basement room type, and there shouldn't be: basement isn't a use, it's an elevation. The room type is what tells the tool which furniture belongs in the frame at all.
The basement is furnished and just photographs dark. Use Enhance instead — a professional edit of brightness, color and perspective with nothing added and nothing removed, so the seller's actual sectional survives and you get the evenly lit version of the room that was there all along. If the furniture is fine but the bins are in the shot, Declutter clears the bins and keeps the furniture.
Either way it's about 30 seconds a photo, and if you're doing a whole lower level, batch the frames in one pass so the furniture stays consistent from shot to shot. And disclose the staging — every time, everywhere the photo appears.
Questions people actually ask
How do you photograph a dark basement?
Turn on every light in the space, and before you do that, walk around with a box of bulbs and make them match. A basement lit by three different color temperatures photographs as a room with orange corners and blue corners, and no editing fixes it cleanly. Then put the phone on a tripod or set it on a box, stand in a corner at about chest height, and let a longer exposure gather the light. A flash bounced off a low ceiling makes a hot spot overhead and dark walls below, which is the exact look people mean when they say a photo looks like a basement.
Should a finished basement be in the listing photos?
Yes, and it should be labelled. A finished basement is square footage buyers do not believe until they see it, and a listing that claims a finished lower level with no photo of it reads as a listing hiding something. Give it two or three frames and name the use in the caption: family room, guest suite, home office, home gym. A named use beats bonus space every time, because bonus space asks the buyer to imagine something and most buyers will not do that work.
Can you virtually stage a basement?
Yes, and it is one of the places virtual staging earns its keep, because an empty basement reads as storage and a furnished one reads as living space. Pick the room type that matches the use you are marketing, such as home office or living room, rather than trying to stage a basement as a generic basement. If the space is already furnished and simply photographs dark, use Enhance instead of Stage: it is a professional edit of brightness, color and perspective with nothing added and nothing removed. Virtual staging must be disclosed wherever the photo appears.
Can you edit a water stain out of a basement photo?
No. Removing a moisture stain, efflorescence on the foundation, an exposed sump pump or a structural post is misrepresentation, not staging, and it is the kind of thing that ends a deal or worse. Declutter removes clutter, which means boxes, bins and laundry piles. It does not remove problems. The buyer brings an inspector who will find every one of those things anyway, so the only thing an edited photo buys you is a furious buyer at the worst possible moment.
The bottom line
The basement is the part of the house where buyers assume the worst until you prove otherwise, which makes it the part where good photos move the most. Match the bulbs, turn everything on, put the camera in a corner at chest height on something that doesn't move, and stay off the stairs. Give the space a name and stage it to match. And leave the stain in the frame — that one's not negotiable. Do that and 700 square feet stops being a claim in your listing copy and starts being a room a buyer can picture using. On the web your first photo is free in supported regions: a watermarked preview saved to your account, unlocked by your first purchase with nothing to redo.