How to Take Great Listing Photos With Your iPhone
The best real estate camera is the one already in your pocket. The settings, the technique, and the edit that finishes the job.
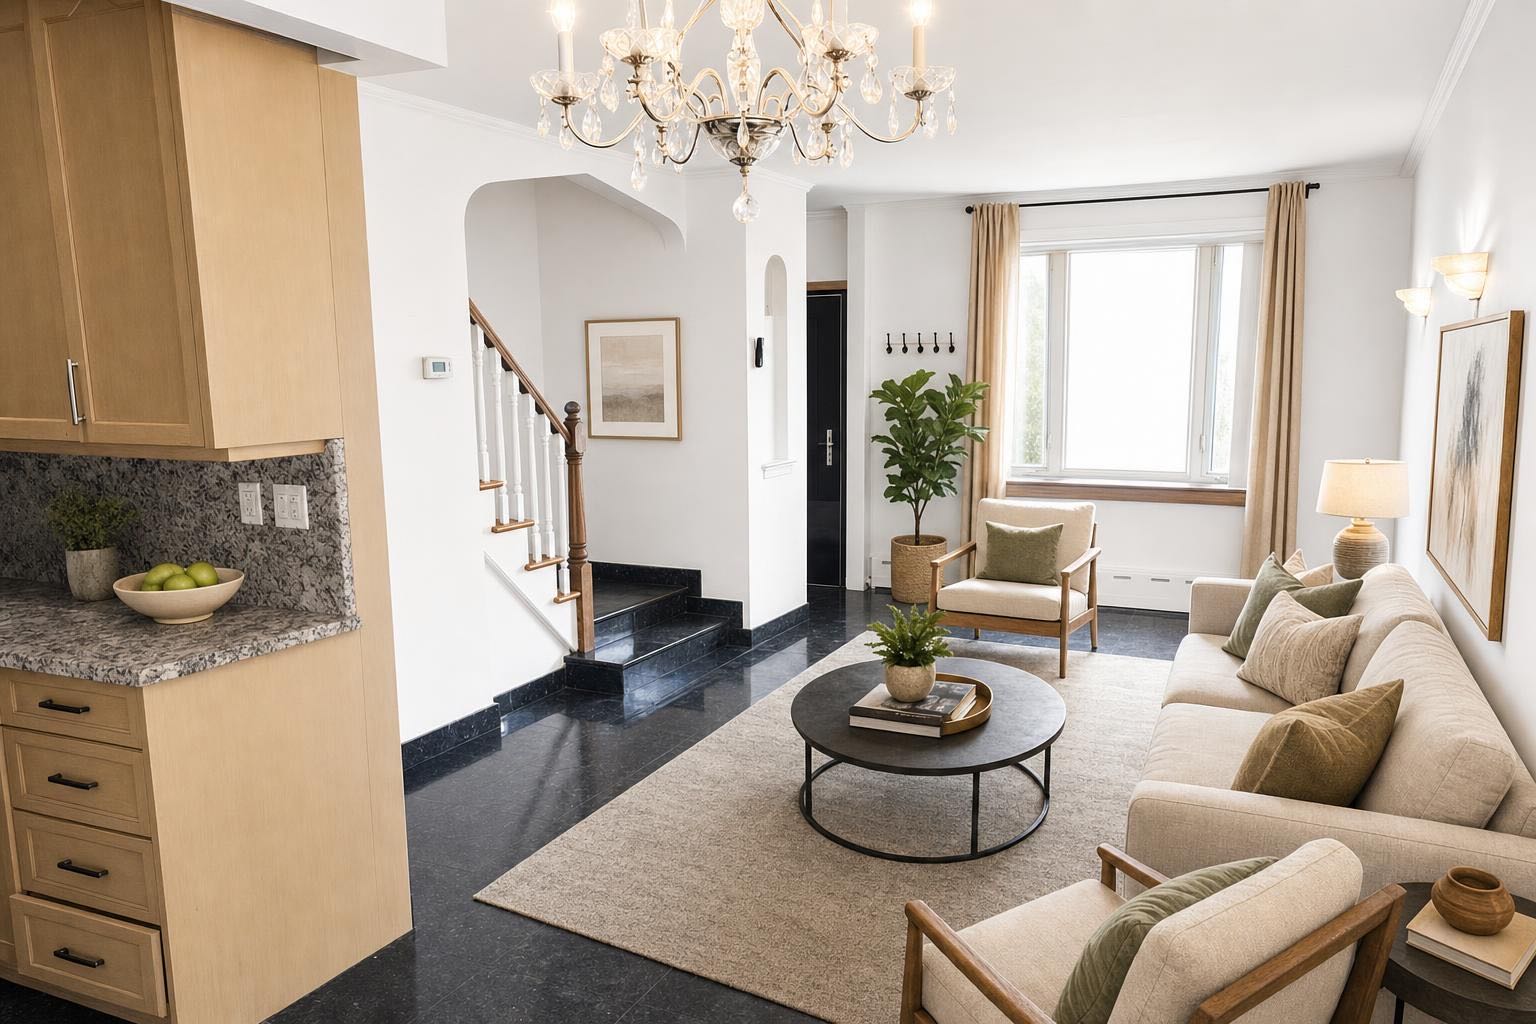
 after
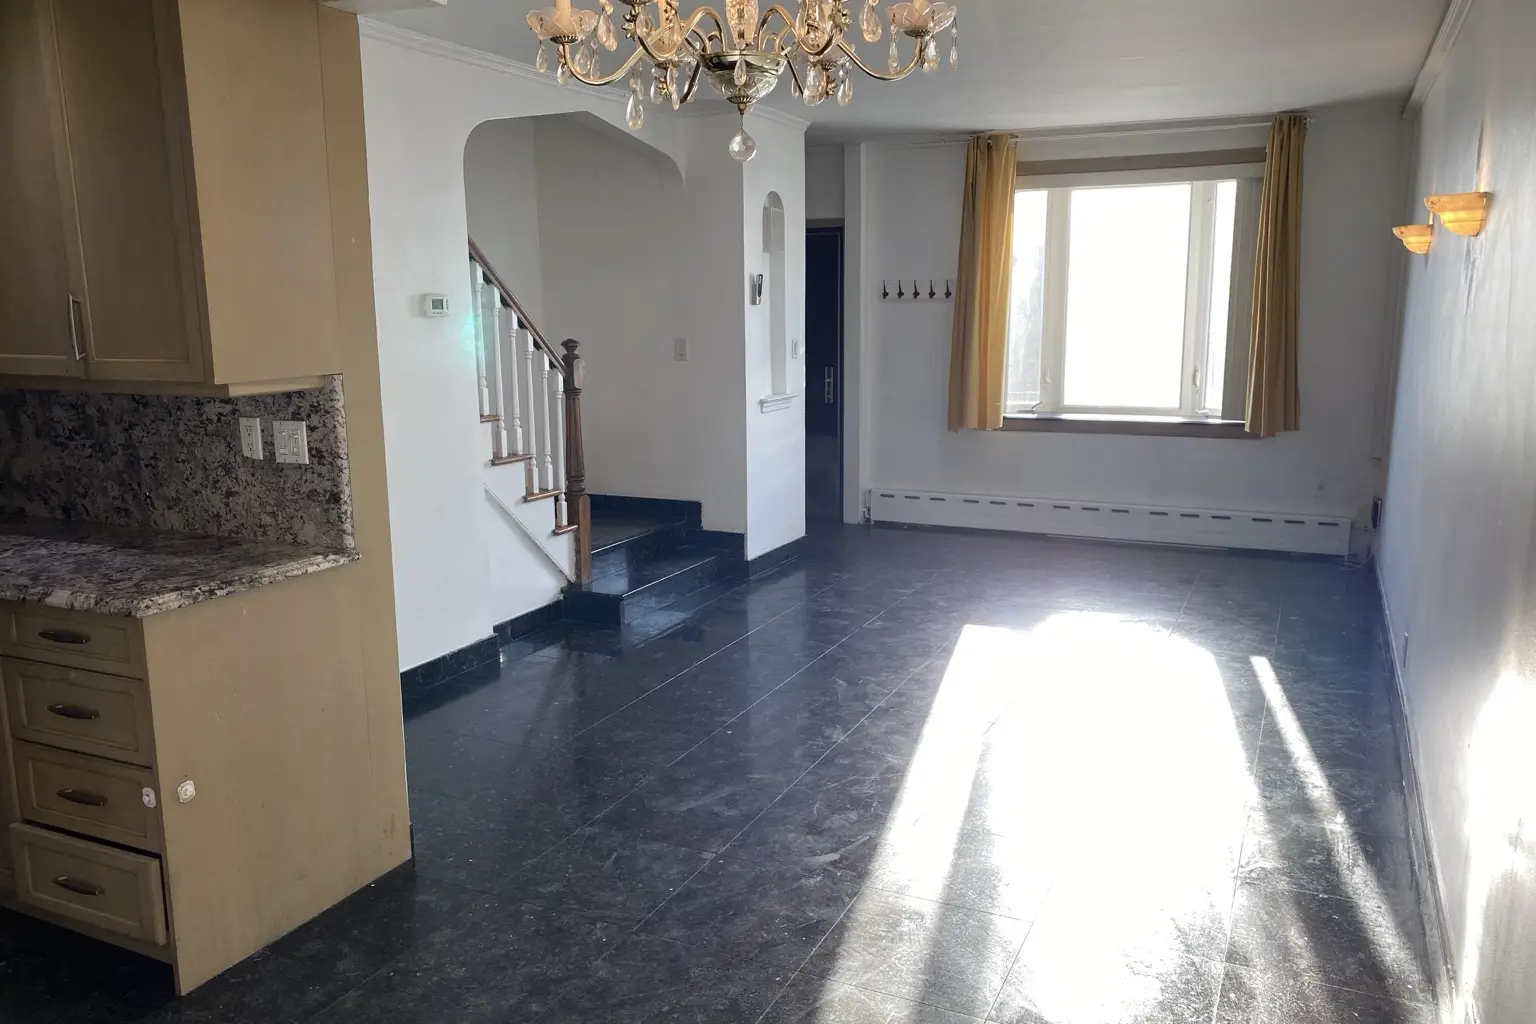
before
after
before
The short version
The iPhone is a good enough camera for listing photos, and the results come from technique rather than the price of the body. Clean the lens, hold it level and low, fight the window-versus-room exposure problem deliberately, then finish with an edit, because a well-shot phone photo still comes out flat.
You do not need a DSLR to shoot listing photos in 2026. A modern iPhone (or any recent flagship Android) has a sensor and computational pipeline good enough for MLS, Zillow, and every booking platform — the gap between a phone and a pro camera is now mostly technique and the final edit, not the hardware. Here's how to get the most out of the camera you already own. This is the iPhone-specific companion to the general how to photograph a room guide.
Set the phone up first
- Clean the lens. The single most common cause of soft, hazy phone photos is a fingerprint-smudged lens. Wipe it before every shoot.
- Turn on the grid. Settings → Camera → Grid. Use it to keep verticals straight and horizons level — crooked walls are the biggest tell of an amateur photo.
- Use the main (1x) lens, not the ultra-wide. The 0.5x ultra-wide is tempting for small rooms but it warps edges badly. Shoot at 1x and back into a corner instead. More on this in wide-angle real estate photos without the distortion.
- Shoot the highest quality. Turn off anything that downsizes your photos; you want full resolution for MLS. Format matters, too — see the HEIC note below.
Hold it level, hold it steady, shoot low
Three habits fix most phone-photo problems. Level: keep the phone perfectly vertical so wall lines stay straight (the iPhone's built-in level overlay helps). Steady: in dim rooms, brace against a doorframe or use a cheap phone tripod to avoid blur. Low: shoot from about chest height, not eye level — a slightly lower angle makes rooms feel larger and more grounded. Composition fundamentals are in how to photograph a room, and the size trick is in how to make small rooms look bigger.
Fight the phone's two big weaknesses: light and windows
Phones struggle with high-contrast scenes — a bright window next to a shadowed interior. Tap on the screen to set the exposure, and drag to balance the room against the window. If the window still blows out, that's a job for HDR blending or a post-shoot edit that recovers both; see HDR real estate photography explained. And always shoot in the best natural light you can — soft morning or late-afternoon light, blinds open, interior lights on. Timing is covered in the best time of day to shoot.
Turn off "keep originals as HEIC" or convert before uploading.
iPhones save photos as HEIC by default, and some MLS and web upload tools choke on it — or the file gets mislabeled as JPEG and fails silently. Shoot in "Most Compatible" (Settings → Camera → Formats) to save JPEGs, or run the photo through a tool that handles the conversion for you. Stylst sniffs and converts HEIC automatically, so a straight-off-the-iPhone photo just works.
The edit is what closes the gap to "pro"
A well-shot phone photo still comes out of the camera a little flat — the color muted, shadows heavy, whites slightly off. The final 20% that makes a photo look professional is the edit: brighten, correct the color, straighten the verticals, and recover the windows. You can do this by hand in the Photos app, but a one-tap tool built for real estate does it faster and more consistently across a whole gallery. The manual basics are in real estate photo editing basics.
Then stage what the camera can't
The phone captures the room; it can't furnish an empty one or clear a cluttered one. That's where virtual staging picks up: snap the bare or lived-in room with your iPhone, then stage or declutter it digitally. It's the step that lets a phone-only seller produce a gallery that looks like it came from a full photo-and-staging team. See how to stage an empty house.
This is the whole FSBO advantage
For someone selling their own home, the iPhone-plus-edit workflow is the great equalizer — it produces photos that hold their own next to agent listings on Zillow, for the cost of a few dollars and an afternoon instead of a photographer's day rate. The full for-sale-by-owner approach is in the FSBO photo playbook. And whatever you do, avoid the common mistakes that mark a listing as DIY-in-a-bad-way.
Where Stylst lands
Stylst is the finish line for an iPhone photo: it converts HEIC, brightens and color-corrects, and stages or declutters the room — about a dollar a photo, about 30 seconds each, no account, no desktop software. Shoot the room right and let Stylst do the professional edit. Stage a photo straight from your phone.
The bottom line
Your iPhone is a good enough camera for listing photos — the results come from technique and the edit, not the price of the body. Clean the lens, keep it level, shoot at 1x in good light, fix the windows, and finish with a real edit and staging. Do that and no one scrolling Zillow can tell your photos came from a phone.
Questions people actually ask
Are iPhone photos good enough for a real estate listing?
Yes, for a normal listing. A recent iPhone resolves more than enough detail for portal display and print flyers, and the gap to a professional result is technique and editing, not sensor size. Where a phone still loses is very low light, very high contrast, and the tilt-shift work a luxury listing might want.
What iPhone settings should I use for listing photos?
Clean the lens first, which fixes more photos than any setting. Turn on the grid so you can keep the phone level, leave HDR on, and tap to set exposure between the bright window and the darker room rather than on either. Shoot at the highest resolution and avoid the ultra-wide unless you need it.
Do I still need to edit an iPhone photo?
Yes, and this is the step that closes most of the gap to a professional result. Straight out of the camera an interior photo tends to be a little flat, slightly cool, with heavy shadows and whites that are not quite white. Correcting brightness, colour and perspective is what makes it read as a listing photo.